Introduction
The Zenith Project is Freestyle’s version of a Senior Thesis, though instead of writing a multipage essay about a given topic, students are expected to self select a project that will showcase what they have learned in Freestyle while pushing them to create something better than they ever have before. The word Zenith itself means “the time at which something is most powerful or successful”, and this is because this project is meant to have students showoff the acclimation of all of their skills after two years of learning them.
For my Zenith project, I decided to try and create six professional level 3D renders with compositional interest, diverse lighting scenarios, and unique sets. In addition, I would be creating a lighting tutorial guide for future Freestyle Students to use. This project came from my desires to eventually become a 3D animator and artist and my frustration with the lack of written lighting tutorials for Maya.
My Zenith Project was a little risky because six separately modeled scenes was ambitious to take on in the amount of time that we were given, especially because it would be coinciding with other projects and testing season. It would also be a challenge to learn a lot of the Maya special effects, especially in regards to lighting, and I would have to do a lot of additional outside research. Most of the things I wanted to pull off, I didn’t already know how to do, so I would have to both learn new ideas and principles and then immediately implement them.
I incorporated my production class skills into the project by utilizing all of the previous modeling skills I had learned and the new ones I learned along the way. I would also be working with the programs that we had been learning all year, such as Adobe Substance Painter and Maya.
Preproduction
I had to decide early on what six scenes that I wanted to do, so I started by making a list of various lighting scenarios. I figured that most lights could be learned with following six lighting scenarios:
- Sunrise
- Early Morning
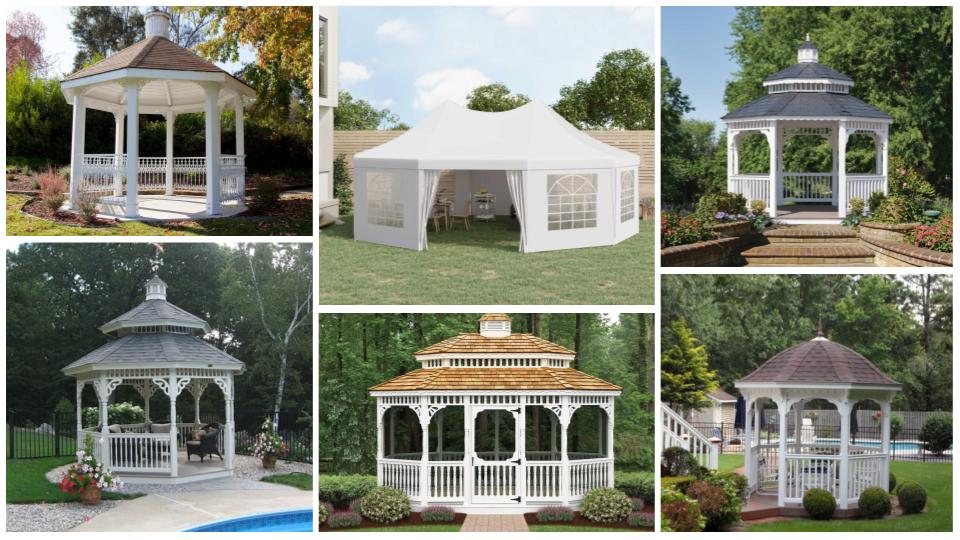
- Outdoor
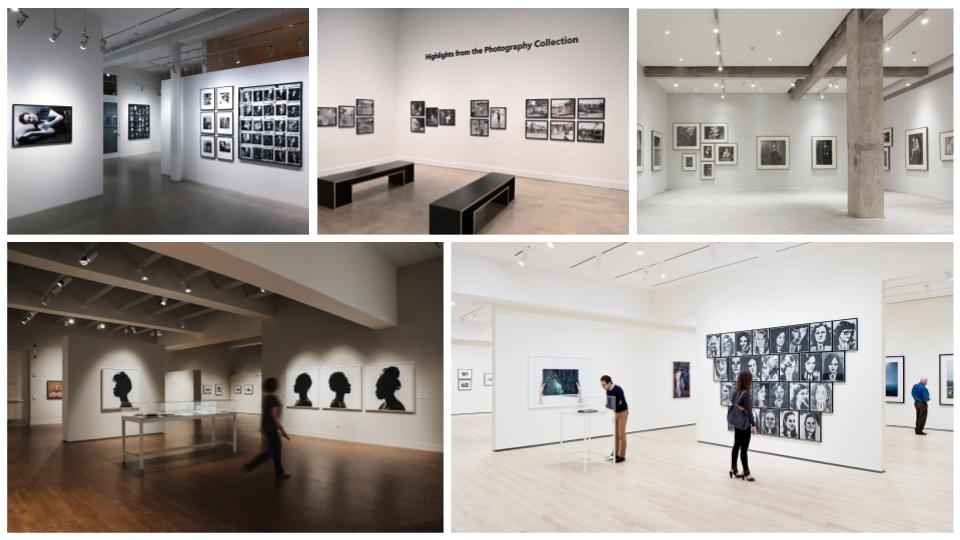
- Indoor
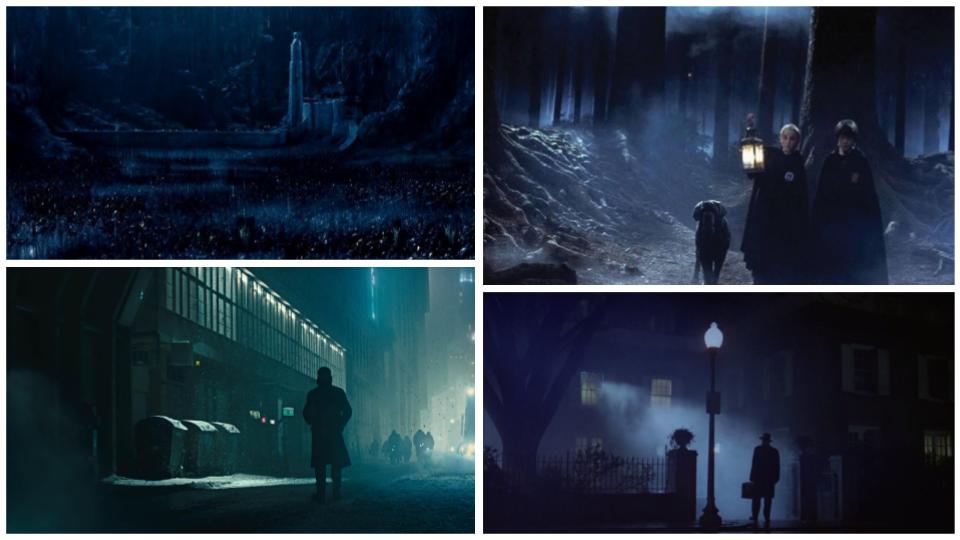
- Nighttime
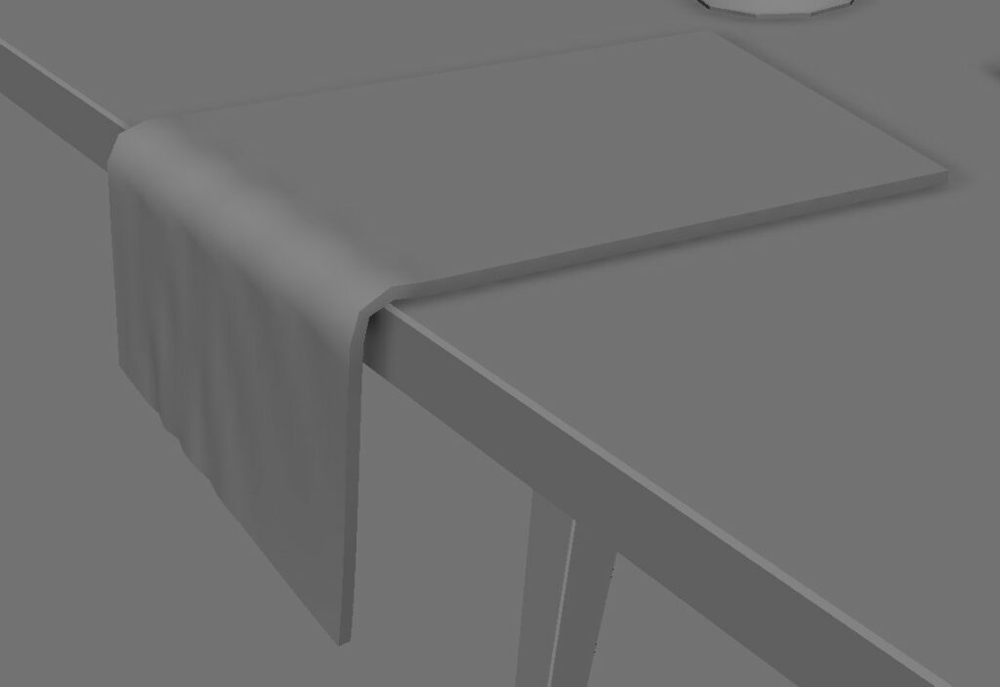
- Candlelight
Once I had my plan for the scenes, I enlisted the help of my family in order to figure out ideas for scenes with each specific type of lighting. Once I had a few ideas from that, I sketched out the ideas and compiled a reference slide show. From the sketches, I created a To-Do list of everything that I would need to model and do for each scene and then began on setting up my scenes.


Modeling
For the modeling, I tried to have special focus on making sure that my topology was well done. I wasn’t planning on animating any of the objects necessarily, but I wanted to get into the practice of making sure that each of my objects was well formed. The earlier objects in this project were pretty good, but I got even better as I worked through the various scenes.
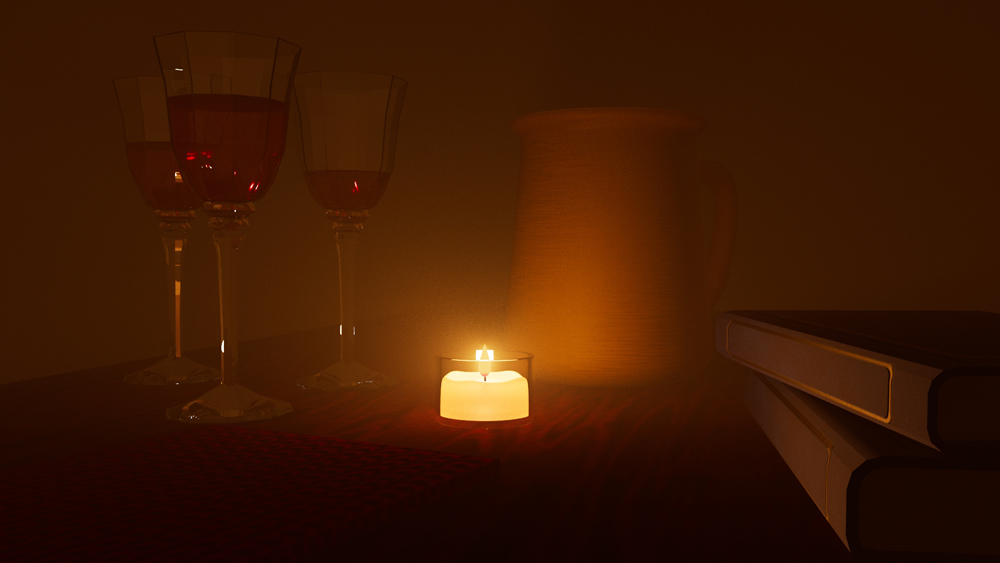
For the candlelight scene, I really wanted several objects that gave a quiet, subtle effect, but still were visually appealing together. I learned how to use n-Cloth and FX settings in Maya in order to create the knit fabric on the side so it would fall naturally on the table, but you can’t really see it in the final render, which is a little ironic. I also used this scene to finally learn how to UV map and applied this to the rest of my models.

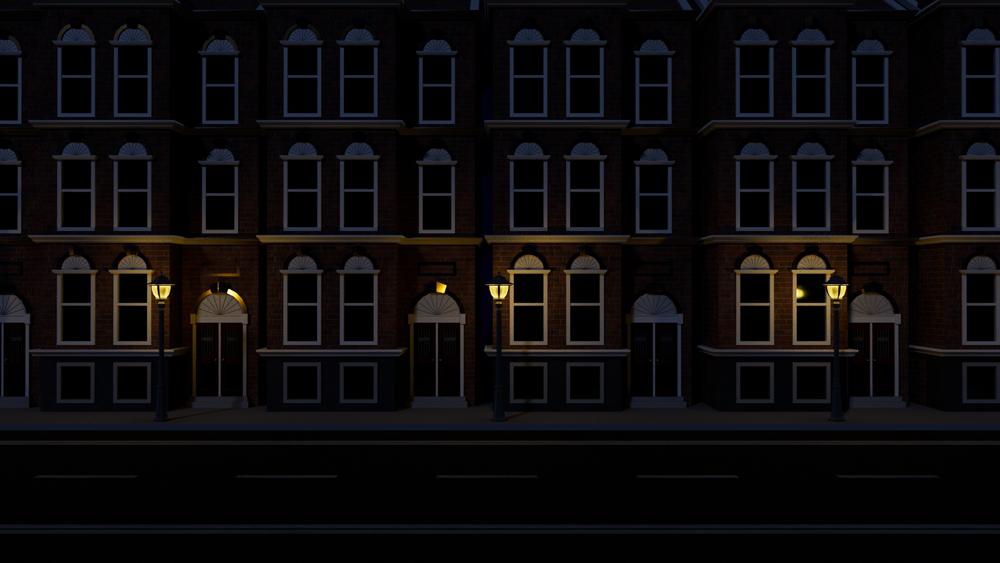
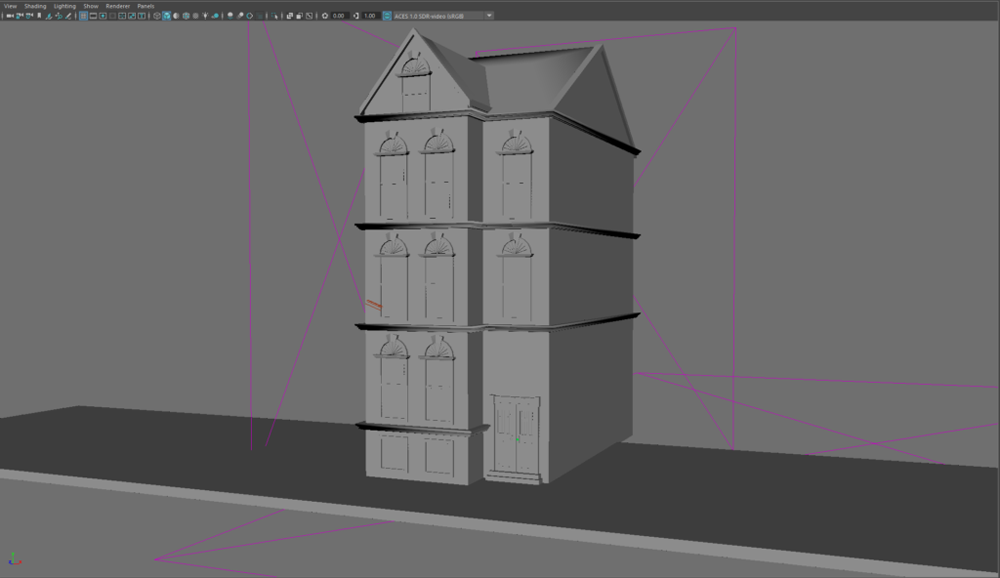
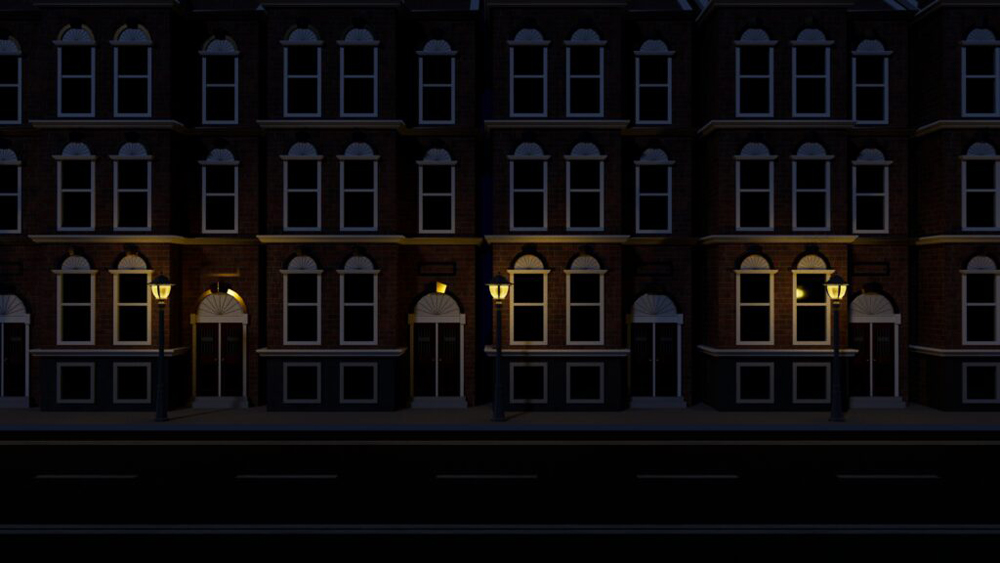
I figured out how to use curves in the nighttime scene. I knew that I could do a rotation around a curve, but I figured out how to make it apply to creating a roof trim. This was one of the most difficult things I had to learn how to do, and there was so much trial and error involved. It was daunting and discouraging, especially when things weren’t working out, but I eventually figured it out and I really like how it turned out.
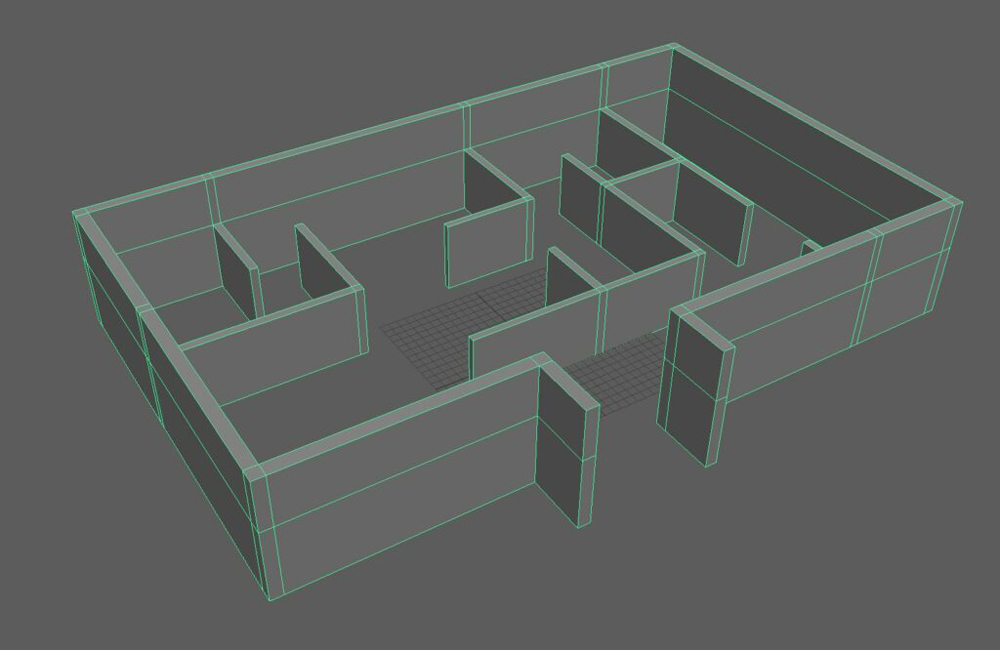
The indoor scene was an exercise in edge-loops and extrusion. I wanted to push myself a little and not take the easy way out of creating separate cubes to form all of the walls and barriers. With a little help from YouTube, I learned that you could use edge-loops and extrusion to create a completely whole wall. This process was time consuming, but it was much more convenient later when I made adjustments to the side of the building because I was editing a single object instead of trying to keep track of multiple.
Texturing
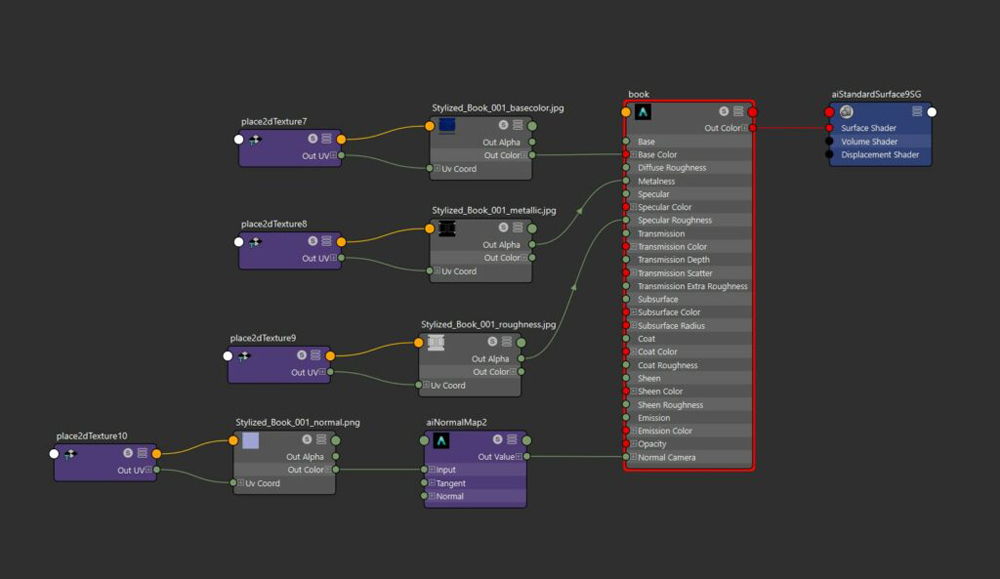
This project felt like the first time that I really learned how to texture. I decided to primarily focus on texturing in Hypershade in Maya instead of Adobe Substance Painter because I felt it would be a good exercise. During this process, I learned the difference between all of the nodes and how to apply them. It also taught me how to UV map my models correctly in order for the textures to actually show up how they were supposed to.
As with my modeling, I started experimenting first with the candlelight scene. I used various YouTube tutorials in order to figure out how to correctly UV map objects, but it was a struggle to figure out at first. I really struggled to figure out the correct way to unwrap my models so they would have the proper pattern and no warping. Eventually I figured it out, but it took a while for me to get the hang of it. In addition, this was when I discovered aiStandardShader with a whole bunch of premade presets for things like glass and gold, which saved me a lot of time because I didn’t have to import those textures.

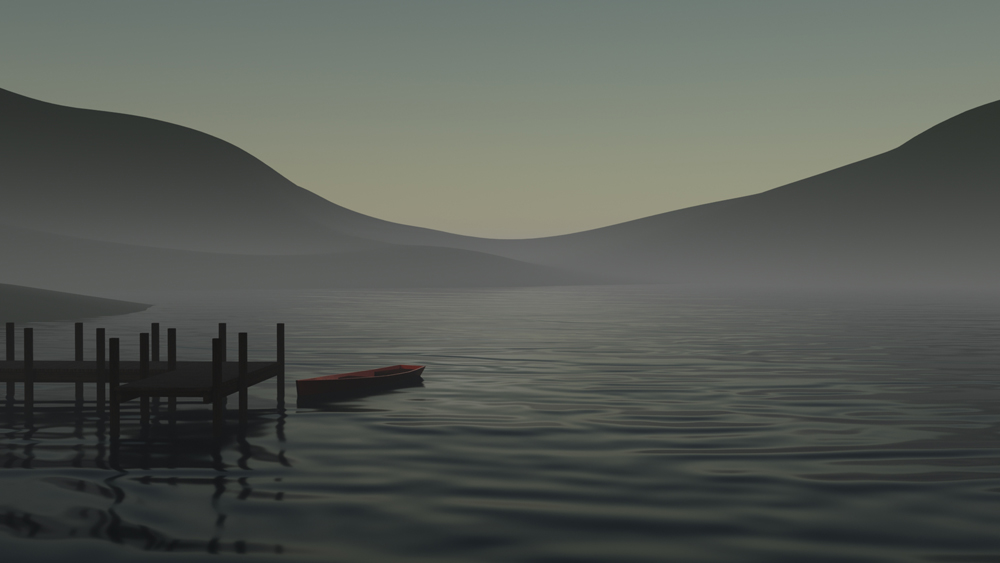
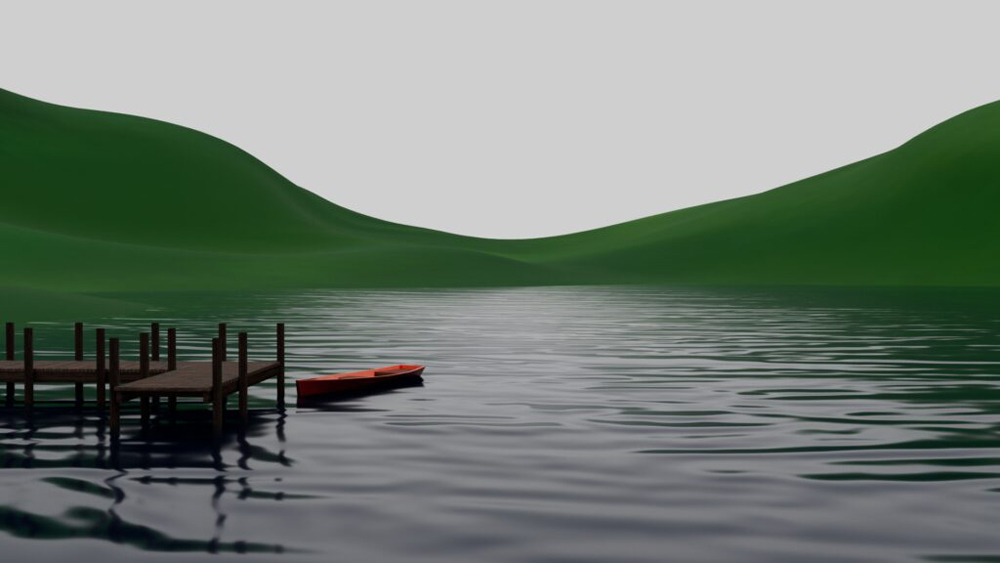
With the early morning scene, I learned how to use displacement maps. After figuring out how to unwrap the boat and the pier, I tackled the large issue of the water, which wasn’t exactly my forte. I had tried to use displacement maps, but it hadn’t really worked out super well thus far. However, I was determined to make it work this time, so I did a lot of google searches until I figured out what I was doing wrong. When the water finally showed up looking like water, it felt like such an achievement and I was super happy with it.

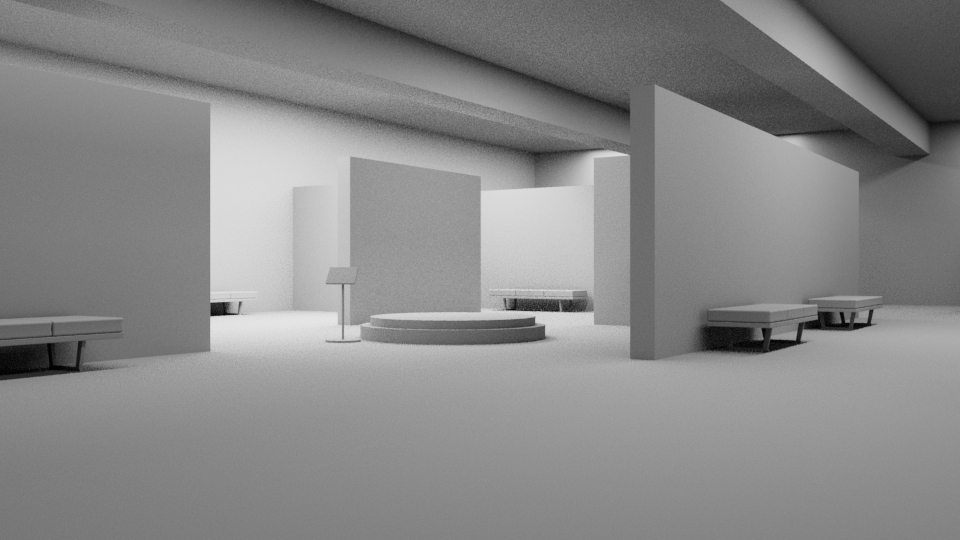
The indoor scene was one of my favorite scenes to texture. By the time I got to it, I understood how to use all of the maps, which made it very straight forward. Originally, I wanted concrete on the museum walls with one accent wood wall for variety and visual interest. However, this ended up not being the case because I put the wood on one wall, fell in love, and then wanted it on the rest. In order to do this though, I need to make sure I did a quality UV unwrapping for all of the walls, which wasn’t a small tasks considering how many of them there were. The results were worth it though and I love this scene so much.


Lighting
Lighting was the main focus of my zenith project, so this part was very important to get done right. I watched more tutorials, and tried to learn how to use each type of light offered by Maya and Arnold. (Add more stuff)
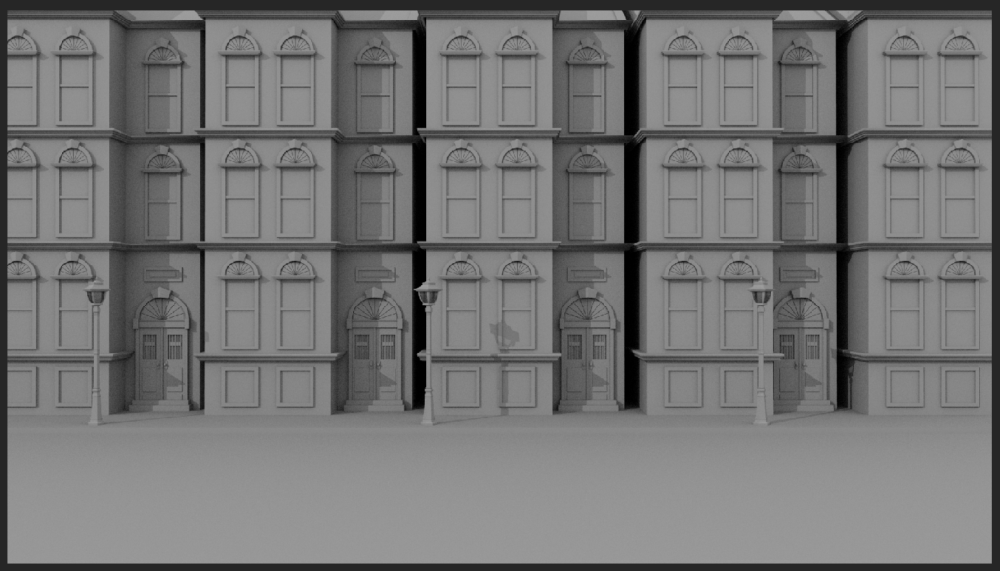
The nighttime scene took inspiration from various movies where you had to be able to light a night scene without taking away from the fact that it was night. I looked at various stills and figured out that this effect was primarily used with blue lights. In order to recreate this effect in a 3D space, I set up the scene with a light source (the lamp posts) using point lights, but made sure that they didn’t extend their light too far. Then I added in the sky dome and a soft directional light, both of which with low intensity, but enough where the rest of the scene wasn’t in complete darkness.
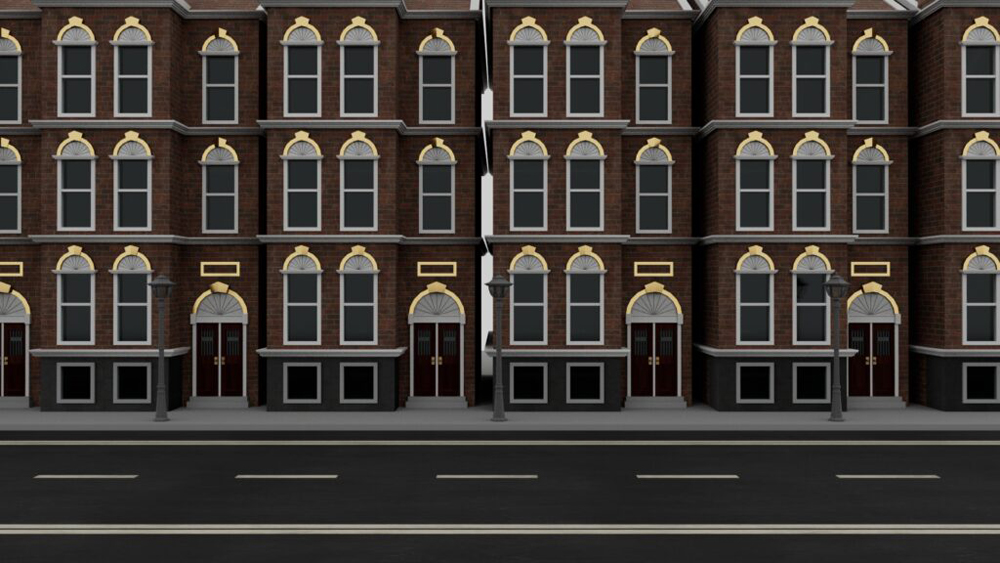
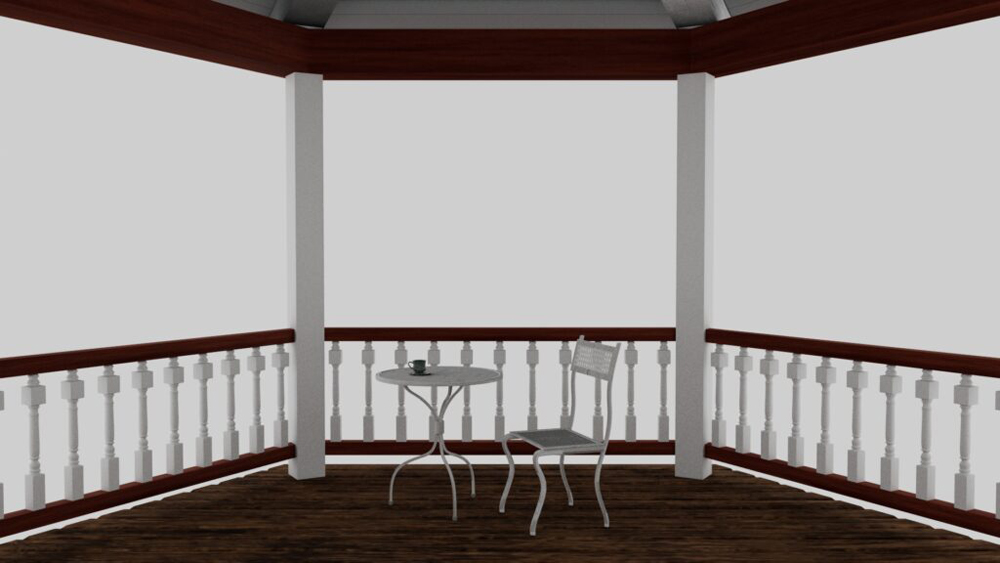
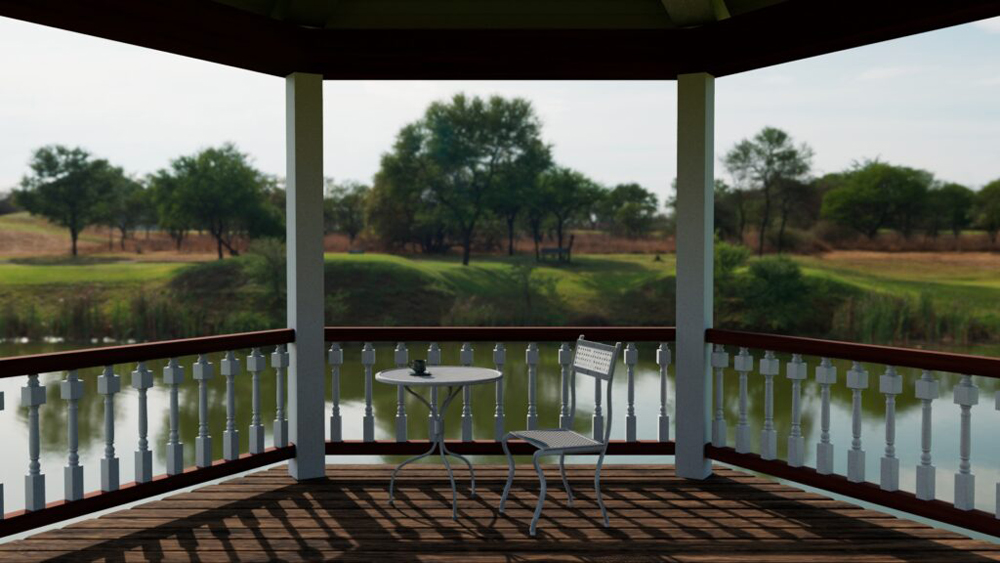
The outdoor scene was a look into types of lighting that wouldn’t require a lot of effort. In an effort to find more information about maya, I discovered HDRI maps. You simply attach the HDRI image to a sky dome (adjusting the intensity and exposure to your liking) and then you have both a light and a background. They are absolute cheat codes when it comes to lighting, and anyone who says otherwise just hasn’t used it yet.
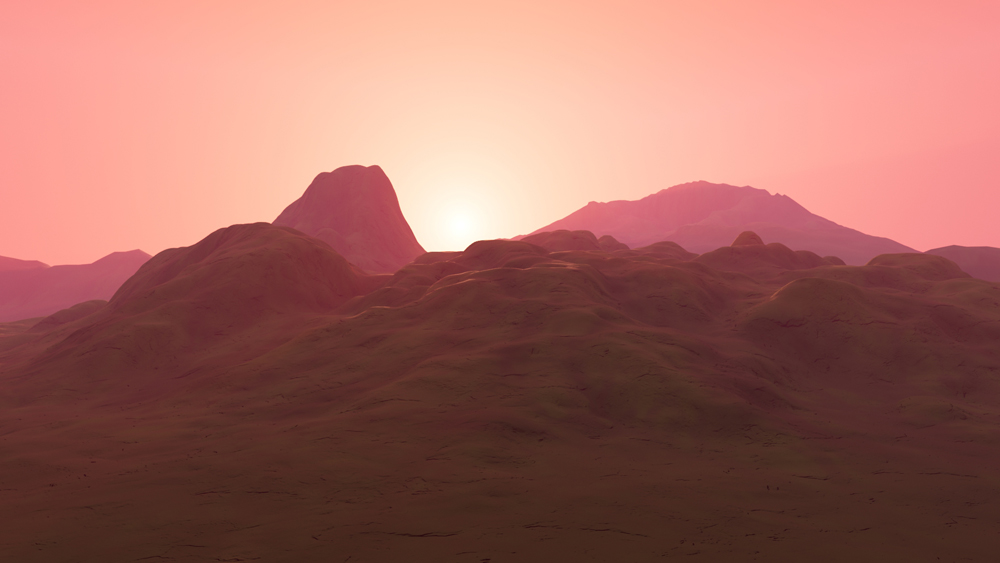
The final scene that I lit was the sunrise scene. This one cased me a lot of problems because I couldn’t figure out how to make it work. I used a Physical Sky, area lights, and a multitude of directional lights, but nothing seemed to create the effect that I wanted. It was about when I was going to admit defeat that I realized that I had been missing something crucial this whole time: atmosphere. Quickly adding, it absolutely transformed my scene and suddenly things were looking up again. Of course, things weren’t smooth sailing always (aka losing hours worth of progress after Maya crashed), but I was motivated and happy with what I was doing, so it was a win in my books.

Final Result
In the end, I finished compiling all of the shots, writing the tutorial guide, and then presented it to my class. This was a very stressful project, but so satisfying to complete. This was by far one of the coolest things I have ever done, and I was so happy with the response to it as well. My Maya knowledge has grown exponentially and I am kind of sad that I will be losing access in a few short weeks after making all of this progress. Still, the 3D modeling lessons will remain, even if it has to be in a different program. I am so thrilled about the result and am so grateful to Freestyle for allowing me this amazing opportunity.