Introduction
For the conceptual unit, we were asked to experiment with many different mediums and styles to challenge ourselves creatively. We used music, art, animation, writing, and more, with many different programs and tools, like DSLR cameras, audio recorders, adobe applications like audition and premiere pro. This unit was important to figure out how we wanted to express ourselves creatively.
The conceptual unit for and Digital media was all about learning how to use different programs for creative projects. We learned how to use premiere pro for video editing, which was challenging for me, as learning new things is frustrating, and I do not handle frustration well. The big project we did in premiere pro was a collaboration with our English class, based off of the field trip we went on to the SFMOMA. We had to reflect on a piece of art that inspired awe in us, which was also difficult, because I don’t generally feel a lot of awe. English was also a lot of trial and error, as our first project was to write about our experience with writing, and I struggle with writing about myself. Overall, this unit in English and Digital media was difficult, but it was rewarding when I got the work done, and it was nice to learn new mediums to express myself artistically.
Art Reflection Video
Our first major project in English and Digital Media was following our field trip to the SFMOMA, where we were asked to reflect on a piece of art that inspired awe in us, using an awe framework we learned in English. In Digital Media, we learned how to use an audio recorder to record ourselves reading our finished reflection, which we then put into Adobe Audition to edit. We then used Premier Pro to edit the recording and any pictures we took into a video with words for emphasis. The process of writing the reflection itself was difficult for me, as I find it hard to be in awe of things around me, but I managed to write something. The video making was relatively easy to do, even if I did do it late. I like that this project got me to think more about what inspires awe within me and how to translate that into a creative project.
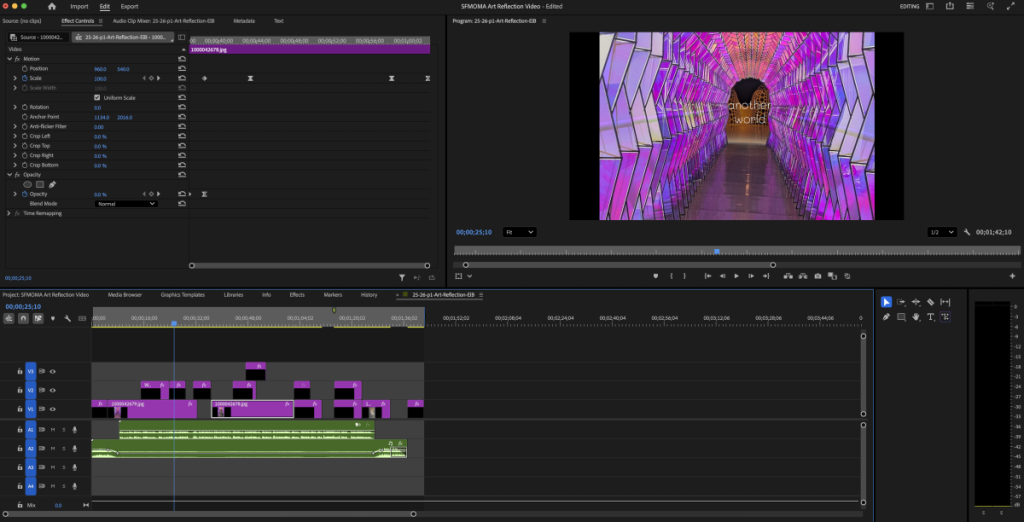
I learned a lot about how Digital Media operates as a class by doing this project. I was a little shocked at how fast we were expected to do things, but I value the way it taught me some work ethic. This project was a nice glimpse into the way the Freestyle classes overlap with one another, and I am excited to do more inter-class projects in the future. I value the programs that we learned in Digital Media during this process, and I value how I learned to really think about what inspires awe in me and how to reflect that in writing in English.
Parody Introduction
▶ My Head Hurts
⏸ My Head Hurts

For the Parody Song project, we were tasked with writing parody lyrics to a song of our choice. This was kind of a struggle for me, as I struggle with procrastination and frustration, which are not a good combo. I eventually came up with writing lyrics to Good Luck, Babe by Chappell Roan, about how my head hurt. I enjoyed the process in retrospect, and it was a good example of how I work under pressure.
Artist Statement
Because I had been crying right before writing my parody(due to procrastination and doing it last minute), I chose to write about how my head hurt, because after I cry my head hurts. I chose the song Good Luck Babe because when I was complaining that my head hurt I just gravitated to that tune.
Writing the lyrics for the parody were relatively easy when I decided what I was going to write about. I wrote them out of order starting with the chorus and then choosing lines I could write easily. The process of producing the parody was also relatively easy, as I just had to follow the instructions and get silly with it. The process of recording the parody was fun, and I had to do three takes, which I spliced together to make a track that I liked. The most interesting part of the process for me was definitely the recording of the vocal track. It was interesting to try and find a balance between funny and decent vocals. Looking back on the parody production process, I think that I would have liked to maybe write more lyrics for it, and finish the song. I am proud of the lyrics I wrote in such a short time, but I would have benefited from writing more, I think.
My lyrics were kind of just about how I deal with headaches when I get them. I have multiple lines about pain meds, which I am averse to taking for whatever reason. The only time I actually take pain meds are when I have a fever, as they can ease fevers, as seen in the line I wrote: I can eat my words if I get a fever. I also tend to just sleep my headaches off, but I am also incapable of going to bed at a reasonable time, hence the lyric: it’s fine I can just sleep it off/ I’m not going to do that though until 3am. Some of the lyrics I wrote were just filler and not stuff I actually feel when I have headaches, like the line about puking, as I do not feel like I need to vomit when I have a headache. I am proud of the lyrics I wrote because I think that they’re funny, and I wrote them in such a short amount of time, so it astounds me that they’re not bad.
Parody Lyrics
I’m fine, its fine
I can say that I am okay, but I might just puke
And guess I’m a fool
With my head in my hands, trying to keep my cool
I don’t wanna take pain meds, its fine I can just sleep it off
I’m not going to do that though, until 3 am
You can stab an ice pick through my eye
Shoot me in the head, try to stop the pounding
I don’t take pain meds that much at all
I can eat my words if i get a fever
My head hurts!
oh, my head hurts!
Just punch me in the face it would hurt less than this
My head hurts!
oh, my head hurts!
Just punch me in the face it would hurt less than this


Photoshop Blend Mode Editing
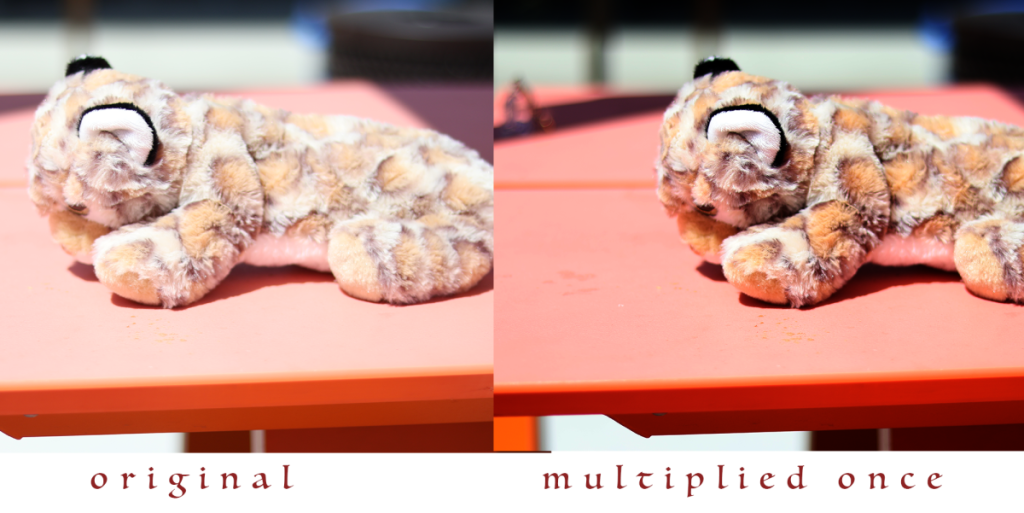
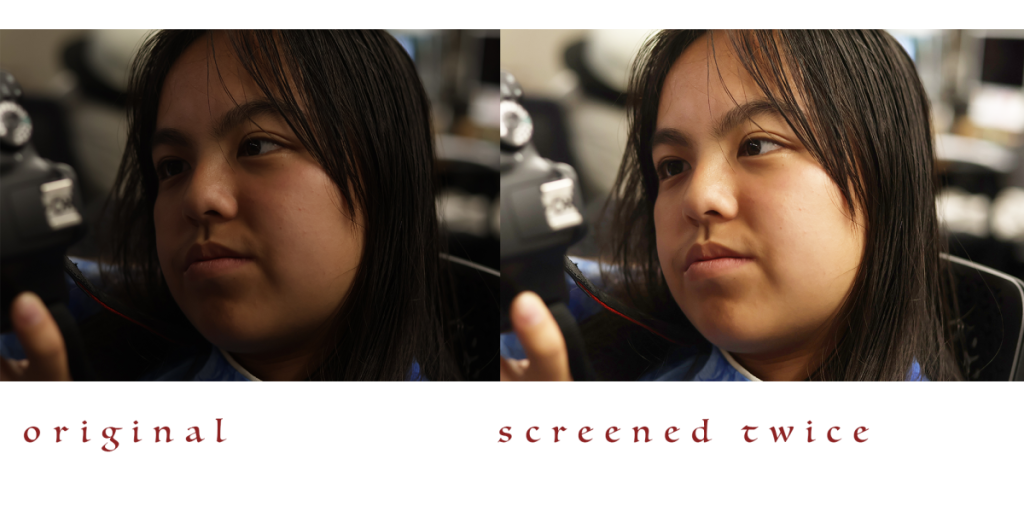
For this assignment, we learned how to use photoshop blend modes to edit photos. The assignment was relatively simple, where first we learned how to use the blend modes with practice photos, and then showcased what we learned by editing our own photos. This was one of the many assignments in Digital Media that was designed to teach us a new skill in a fun way.
I value the ability to make my photos prettier with the knowledge I learned about blend modes. It will really come in handy whenever I need to darken or brighten photos especially. While I don’t see myself using blending 2 photos together using blend modes, I do see myself lightening and darkening photos in future creative projects. While maybe not in photoshop, I do see myself using blend modes in my digital art in the future.




DSLR Photos
At the beginning of the year in Digital Media, we learned how to use the cameras we were given. We had many days set aside to learn, each day learning a different technique to take cool photos. We learned about Av mode, which allowed us to take photos at different depths of field(which gave us control over what was blurry in a photo), and Tv mode which allowed long exposure(captured very slowly to let in a lot of light, which allowed us to do light painting in photos). We also learned how to use flash photography in front of various backdrops and how to change the ISO to make photos lighter or darker, as well as how to change the white balance of a photo to make it look like it was taken in different weather.


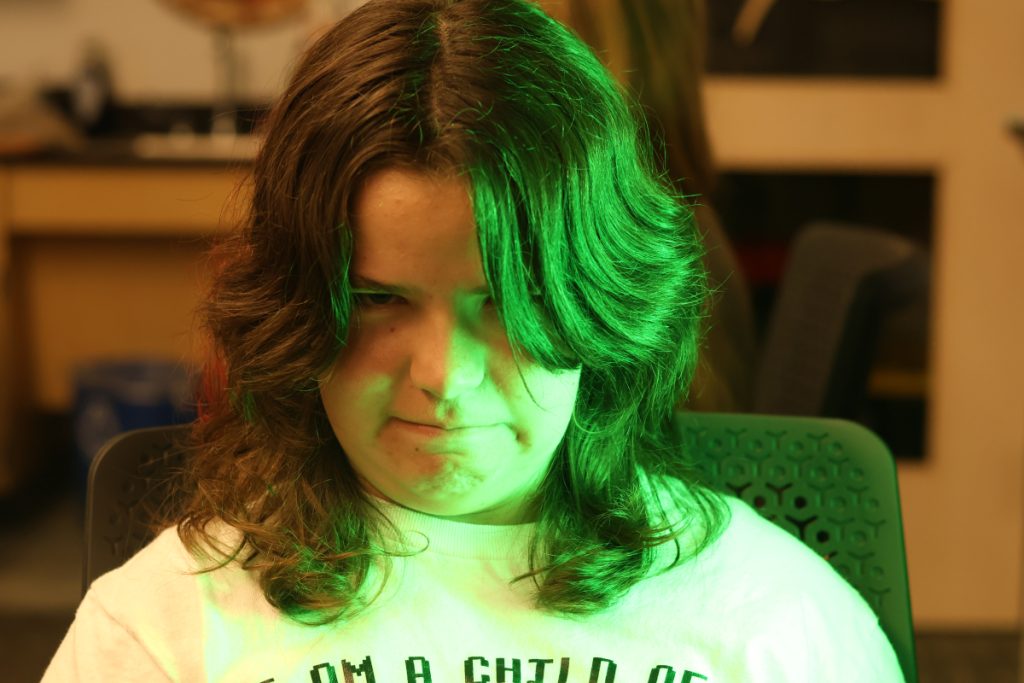


I enjoyed learning how to use the camera I was given. I really liked learning depth of field, although I had already learned how from a previous class, it was nice learning on a new camera. I use that tool less than others, just because I sometimes forget it exists, but I would like to use it more in the future. I also really enjoyed long exposure and light painting because I thought it was quite fun that a photo could take that long to capture. I do find it useful for if I ever need to take photos at night. I didn’t get to take any flash practice photos on my own camera, because animation students cameras were not compatible with the flash extension that we used, but I did get to on another persons camera. I am a bit upset that I don’t have access to those photos I took, but it was still good to learn. I probably use ISO changes the most out of all of these techniques, as it is fun to play with how much light is getting into a photo. White balance was also quite fun to play with. Overall, I really value every technique we learned, and am excited to continue to use them in future photo blogs.
Animation
Introduction
Throughout the year in Animation class, I have grown greatly as an animator. At the start of the year, I had very little experience in animation, with only a few animations from years and years ago. Animating more than a few frames was completely new to me though, and I struggled with coming up with ideas after those first few frames. I got the hang of it eventually, though, and ended up really liking most of my end products. I value the work that we do in animation, as it is quite difficult and time consuming, but very rewarding in the end. It helped me develop better time management skills and faster drawing skills as well, which I value very much.
History of Animation
For one of our first assignments, we were asked to right an essay on the history of animation and the 12 principles of animation. We got the info from youtube videos on those topics, and rewrote them in our own words.
Zoetrope/Praxinoscope
A zoetrope, or praxinoscope, is one of the first forms of animation that was invented. It involves a strip of paper, with different ‘frames’ that is placed in a cylinder with mirrors that is spun, and the frames in the mirrors animate.
Phenakistoscope Wheel
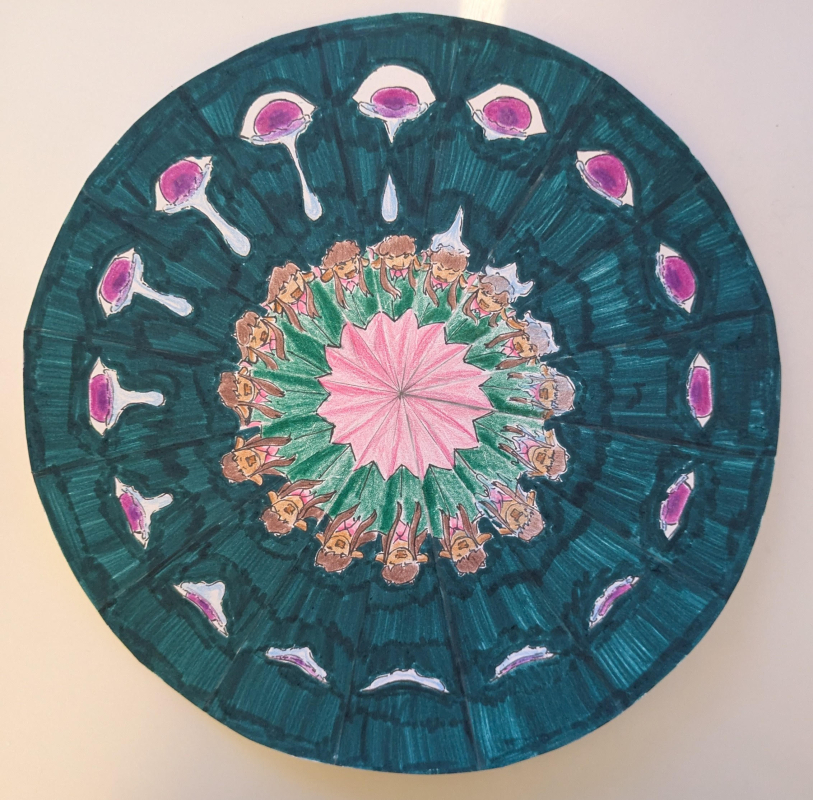
The phenakistoscope is another one of the first animation techniques that was invented. It involves a wheel with ‘pie slice’ frames that when spun and viewed through a hole in the center in a mirror, animates. We used two different draft sheets, alternating between drawing the next frame on one of them, and copying the previous frame on the other. We then colored it on a new final sheet. To digitize it we used photoshop and its frame animation tool where every frame was the previous frame rotated slightly until the wheel went all the way around.


Artist statement
In this phenakistoscope, I used pencil, pen, colored pencil, and water based marker on cardstock. We first animated it using two draft pages, alternating which one we were using, one as the copy, and the other as the main one. We then traced the draft sheet onto cardstock and colored it.
For this project, I wanted to animate one of my characters, but I struggled with exactly what I was going to draw. I overcame that by just starting to draw and seeing where it took me. I ended up drawing my character Euphrasia, and a random floating eyeball crying on her because I thought it would be cool and fun to draw. If I were to change it, I would probably make it so that the action in the animation was more relevant to my character’s story. I grew from this project artistically by learning how to animate, as I had not done very much animation before this. I confirmed that I am decently good at it, too. I also grew in the way I colored it, as I had never really used colored pencils prior to this as well.
I am most proud of the faces I drew on my character, because I think she turned out quite cute. I am also proud of the tear animation, as I was surprised that I could animate water well. I will use the ideas I learned by getting sillier with mediums in future projects and in general just getting looser with my art.
Flipbooks
The first more long term project we did in animation was a flipbook. It had 90 frames and we used light boards to trace and animate them. A flipbook is a form of animation where the act of flipping through the book animates a scene. This project was definitely the most time consuming out of all of the projects up to this point, and it was a real challenge to complete. The second flipbook, despite being less frames, took me longer than the first, probably because it was entirely marker colored and had more detail. I enjoyed this project the most out of all of the project, though, as it was fun and a nice challenge.
We did two different flipbooks, one that was meant to be analogue and actually flipped through.
I made mine about a character I created with a group of friends. I titled it dreaming because it happens in her dream, meeting a different character from her story.
The second flipbook we made was not meant to be flipped through physically, only digitally. It was also a collaborative whole junior animation wide flipbook, with the ending frame of one persons being the starting frame of the next persons.
I made mine about a different character of mine, who is a fish person, and I thought it would be funny to have him eat an actual fish.
Paper Cutout Stop Motion
The next project we did after digitizing our flipbooks was a paper cutout stop motion animation. This was an interesting project to do, because I was inexperienced in the medium of paper cutouts, and it was annoying trying to get all of the pieces stay in the right spot. I also decided to do really complicated designs for my puppets, which did not do me any favors. I ended up using tape and glue in some places to make the puppets stick together, which did cost me some detail but the end product looked fine. I did end up making the animation itself fairly simple, and I animated it on 2s, meaning one frame was on screen for 2 frames.
Object Stop Motion
To continue with the stop motion medium, the next project we did was stop motion using objects. We could either make our objects or use objects we found in hour house, and because my paper stop motion was so complicated, I decided to go the easy route and animate objects I found in my house. This was a good idea, because I ended up having to re do it, as the first time I animated it, something went wrong and my hand ended up in the animation, but I could not find it in the timeline. It was relatively easy to reanimate, though, and I think that it turned out quite cute.
I used 2 of my stuffed animals that I’ve had for a while to animate this.