𝙸𝚗𝚝𝚛𝚘𝚍𝚞𝚌𝚝𝚒𝚘𝚗
This project allows me to show my creativity through music, art, and web production. This allows students to be able to express their personal aesthetic. Students would begin to develop their technical communication skills by using/ learning modern professional equipment, including DSLR Cameras. Some applications they would use are Recorders, Adobe Photoshop, Adobe Animate, Adobe Premiere Pro, Adobe After Effects, Adobe Audition, Avid Pro Tools, WordPress, and Google Apps. This would help students show their skills.
In English and Digital Media, the first project at Freestyle during the Conceptual Unit was using Adobe Premiere Pro and the SFMOMA Reflection. The Adobe Premiere Pro project allows me to learn more about Premiere Pro and shows me different new tools since I’ve never used it. It allowed me to animate and fade in text and images. Which later on helped me with later projects. While the SPMOMA Reflection in English taught me about brick words and how they are very important. This project involved writing a reflection on one art piece that we took a photo of during the SFMOMA field trip. These two projects will help me with other projects in the future and also my writing outside of class.
𝙰𝚛𝚝 𝚁𝚎𝚏𝚕𝚎𝚌𝚝𝚒𝚘𝚗
In Freestyle in English during our Conceptual Unit, we learn how to write a reflection about our trip to the SFMOMA visit. We would have to write about one piece we chose that was showcased at the MOMA. Then we would bring this writing to Digital Media, where we would record the speech that we wrote in English and would make a video of the image and the speech. Something that I struggled with was not having enough photos and also many brick words.
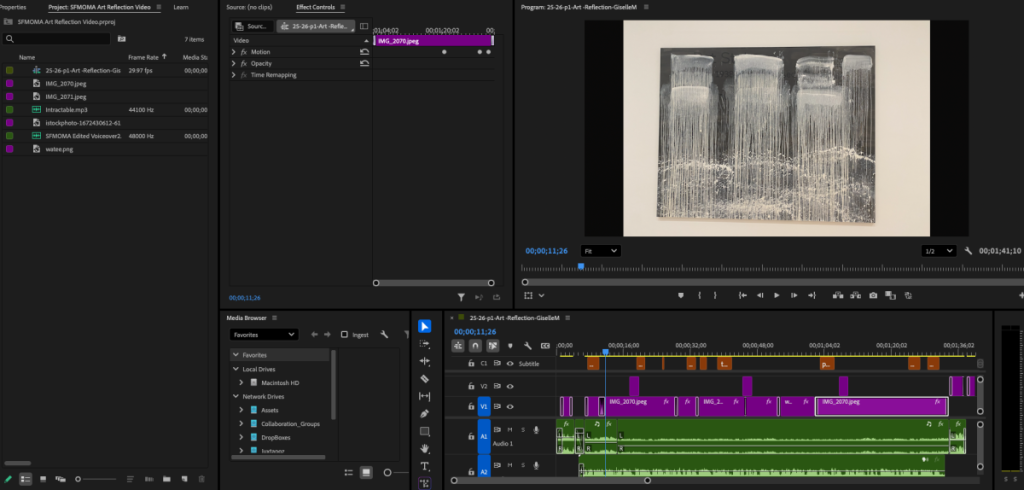
In English, we first would have to write our first draft for the art piece that we chose, which is shown here, and I chose the Three Painted Waterfall by Pat Steir. Then we show it to our classmates, and then we do our second revision. During this project, something that we would use is using different key frames so that we can add effects like fading in/ fading out, or making the text appear different times. We would also add music and fades in and out, and also captions, so we can emphasize the big, important words. In my project, I also added different pictures that weren’t from the MOMA, so I can show what I was trying to say in my speech. The Art Reflection Video production allows me to learn new tools and how to create a video using Adobe Premiere Pro.
𝙿𝚊𝚛𝚘𝚍𝚢 𝙸𝚗𝚝𝚛𝚘𝚍𝚞𝚌𝚝𝚒𝚘𝚗
▶ House of Halloween
⏸ House of Halloween

When making our Parody we wanted to do something Halloween related because it was almost Halloween and it would be a great song. We chose House of Memories for the song that we wanted to make a parody because it sounds like a haunted house. We would later go to the recording booth to record our song and later on on the computer use Adobe Premiere to edit our songs like adjusting the volume and choosing with part is the best because we recorded 5 different times so we can cut parts to make it better.
Since it’s October and Halloween is coming around, we chose to sing about Halloween. We chose the song “House of Memories” by scrolling through old songs we used to listen to back in around 2020, and we spun a wheel. When first writing the lyrics, we were thinking about the feeling of Halloween, like cold and spooky, rather than the cutesy dressing up and costuming vibe. During recording, we went in practically blind and spent a lot of time in the booth re-recording because we’d barely thought about how we’d sing it with the music, which is something I think I could do better next time. Here are some of the insights about our parody lyrics: We couldn’t find a lot of spooky words to put in the lyrics which would match the syllables for the original lyrics, so we had to separate some verses. We had the most fun singing the “WHOAOAOAOOA” which was in the intro, the middle of the song, and the ending.
𝙿𝚊𝚛𝚘𝚍𝚢 𝙻𝚢𝚛𝚒𝚌𝚜
“𝙒𝙝𝙤𝙖 𝙤𝙝 𝙤𝙝 𝙤𝙝 𝙤𝙝 𝙤𝙝 𝙤𝙝 𝙤𝙝
𝙒𝙝𝙤𝙖 𝙤𝙝 𝙤𝙝 𝙤𝙝 𝙤𝙝 𝙤𝙝 𝙤𝙝 𝙤𝙝
𝙄𝙛 𝙮𝙤𝙪’𝙧𝙚 𝙖 𝙢𝙤𝙣𝙨𝙩𝙚𝙧, 𝙮𝙤𝙪 𝙨𝙝𝙤𝙪𝙡𝙙 𝙠𝙣𝙤𝙬
𝙏𝙝𝙚 𝙢𝙞𝙙𝙣𝙞𝙜𝙝𝙩 𝙢𝙤𝙢𝙚𝙣𝙩𝙨 𝙤𝙣𝙡𝙮 𝙜𝙧𝙤𝙬
𝙏𝙝𝙚 𝙡𝙤𝙣𝙜𝙚𝙧 𝙮𝙤𝙪’𝙧𝙚 𝙞𝙣 𝙛𝙧𝙞𝙜𝙝𝙩
𝙏𝙝𝙖𝙣 𝙞𝙛 𝙮𝙤𝙪 𝙬𝙚𝙧𝙚 𝙖𝙡𝙤𝙣𝙚 𝙒𝙝𝙞𝙨-𝙥𝙚𝙧𝙨 𝙩𝙪𝙧𝙣 𝙞𝙣𝙩𝙤 𝙨𝙝𝙖𝙙𝙤𝙬𝙨
𝙀𝙘𝙝𝙤 𝙩𝙝𝙧𝙤𝙪𝙜𝙝 𝙩𝙝𝙚 𝙩𝙤𝙢𝙗 𝙄 𝙙𝙤𝙣’𝙩 𝙬𝙖𝙣-𝙣𝙖 𝙗𝙚 𝙖𝙛𝙧𝙖𝙞𝙙
𝙏𝙝𝙚 𝙙𝙚-𝙚𝙥𝙚𝙧 𝙩𝙝𝙖𝙩 𝙄 𝙧𝙤𝙖𝙢 𝙄𝙩 𝙩𝙖𝙠𝙚𝙨 𝙢𝙮 𝙗𝙧𝙚𝙖𝙩𝙝 𝙖𝙬𝙖𝙮
𝘾𝙤𝙡𝙙 𝙘𝙝𝙞𝙡𝙡𝙨, 𝙚𝙡𝙚𝙘𝙩𝙧𝙞𝙘 𝙗𝙤𝙣𝙚𝙨
𝙂𝙝𝙤𝙨𝙩 𝙩𝙤 𝙜𝙝𝙤𝙨𝙩 𝙖𝙣𝙙 𝙚𝙮𝙚𝙨 𝙩𝙝𝙖𝙩 𝙜𝙡𝙤𝙬 𝙄𝙨 𝙩𝙝𝙞𝙨 𝙮𝙤𝙪𝙧 𝙙𝙤𝙤𝙢?
𝘽𝙖𝙗𝙮, 𝙬𝙚 𝙗𝙪𝙞𝙡𝙩 𝙩𝙝𝙞𝙨 𝙝𝙤𝙪𝙨𝙚 𝙤𝙛 𝙩𝙧𝙖𝙜𝙚𝙙𝙞𝙚𝙨
𝙃𝙖𝙣𝙜 𝙢𝙮 𝙥𝙤𝙧𝙩𝙧𝙖𝙞𝙩 𝙣𝙤𝙬
𝙎𝙘𝙧𝙚𝙖𝙢 𝙞𝙩 𝙬𝙝𝙚𝙣 𝙮𝙤𝙪 𝙨𝙚𝙚 𝙞𝙩
𝘼𝙣𝙙 𝙬𝙝𝙚𝙣 𝙮𝙤𝙪𝙧 𝙣𝙞𝙜𝙝𝙩-𝙢𝙖𝙧𝙚𝙨
𝙏𝙪𝙧𝙣 𝙩𝙤 𝙢𝙚𝙢𝙤𝙧𝙞𝙚𝙨
𝙋𝙧𝙤𝙢𝙞𝙨𝙚 𝙢𝙚 𝙖 𝙥𝙡𝙖𝙘𝙚 𝙄𝙣 𝙮𝙤𝙪𝙧 𝙝𝙖𝙪𝙣𝙩𝙚𝙙 𝙜𝙖𝙡𝙡𝙚𝙧𝙮
𝙒𝙝𝙤𝙖 𝙤𝙝 𝙤𝙝 𝙤𝙝 𝙤𝙝 𝙤𝙝 𝙤𝙝 𝙤𝙝
𝙒𝙝𝙤𝙖 𝙤𝙝 𝙤𝙝 𝙤𝙝 𝙤𝙝 𝙤𝙝 𝙤𝙝 𝙤𝙝
𝙄 𝙩𝙝𝙞𝙣𝙠 𝙤𝙛 𝙮𝙤𝙪 𝙛𝙧𝙤𝙢 𝙩𝙞𝙢𝙚 𝙩𝙤 𝙩𝙞𝙢𝙚
𝙒𝙝𝙚𝙣 𝙩𝙝𝙚 𝙢𝙤𝙤𝙣 𝙗𝙚𝙜𝙞𝙣𝙨 𝙩𝙤 𝙘𝙡𝙞𝙢𝙗
𝙔𝙤𝙪 𝙬𝙚𝙧𝙚 𝙟𝙪𝙨𝙩 𝙩𝙤𝙤 𝙨𝙬𝙚𝙚𝙩
𝘼𝙣𝙙 𝙄 𝙬𝙖𝙨 𝙩𝙤𝙤 𝙘𝙪𝙧𝙨𝙚𝙙 𝙩𝙤 𝙨𝙝𝙤𝙬
𝙏𝙝𝙖𝙩’𝙨 𝙖𝙡𝙡 𝙩𝙝𝙖𝙩 𝙧𝙚𝙖𝙡𝙡𝙮 𝙢𝙖𝙩𝙩𝙚𝙧𝙨
𝙉𝙤𝙬 𝙝𝙚𝙧𝙚 𝙬𝙚 𝙜𝙤…
𝘽𝙖𝙗𝙮, 𝙬𝙚 𝙗𝙪𝙞𝙡𝙩 𝙩𝙝𝙞𝙨 𝙝𝙤𝙪𝙨𝙚 𝙤𝙛 𝙩𝙧𝙖𝙜𝙚𝙙𝙞𝙚𝙨
𝙃𝙖𝙣𝙜 𝙢𝙮 𝙥𝙤𝙧𝙩𝙧𝙖𝙞𝙩 𝙣𝙤𝙬,
𝙎𝙘𝙧𝙚𝙖𝙢 𝙞𝙩 𝙬𝙝𝙚𝙣 𝙮𝙤𝙪 𝙨𝙚𝙚 𝙞𝙩
𝘼𝙣𝙙 𝙬𝙝𝙚𝙣 𝙮𝙤𝙪𝙧 𝙣𝙞𝙜𝙝𝙩-𝙢𝙖𝙧𝙚𝙨 𝙏𝙪𝙧𝙣 𝙩𝙤 𝙢𝙚𝙢𝙤𝙧𝙞𝙚𝙨
𝙋𝙧𝙤𝙢𝙞𝙨𝙚 𝙢𝙚 𝙖 𝙥𝙡𝙖𝙘𝙚 𝙄𝙣 𝙮𝙤𝙪𝙧 𝙝𝙖𝙪𝙣𝙩𝙚𝙙 𝙜𝙖𝙡𝙡𝙚𝙧𝙮
𝙒𝙝𝙤𝙖 𝙤𝙝 𝙤𝙝 𝙤𝙝 𝙤𝙝 𝙤𝙝 𝙤𝙝 𝙤𝙝
𝙒𝙝𝙤𝙖 𝙤𝙝 𝙤𝙝 𝙤𝙝 𝙤𝙝 𝙤𝙝 𝙤𝙝 𝙤𝙝
𝙏𝙝𝙤𝙨𝙚 𝙩𝙝𝙤𝙪𝙜𝙝𝙩𝙨 𝙤𝙛 𝙥𝙖𝙨𝙩 𝙢𝙤𝙣𝙨𝙩𝙚𝙧𝙨 𝙩𝙝𝙚𝙮’𝙡𝙡 𝙖𝙡𝙬𝙖𝙮𝙨 𝙝𝙖𝙪𝙣𝙩 𝙢𝙚
𝙄 𝙬𝙞𝙨𝙝 𝙄 𝙘𝙤𝙪𝙡𝙙 𝙗𝙚𝙡𝙞𝙚𝙫𝙚
𝙔𝙤𝙪’𝙙 𝙣𝙚𝙫𝙚𝙧 𝙘𝙪𝙧𝙨𝙚 𝙢𝙚
𝙏𝙝𝙚𝙣 𝙬𝙞𝙡𝙡 𝙮𝙤𝙪 𝙧𝙚𝙢𝙚𝙢𝙗𝙚𝙧 𝙢𝙚 𝙬𝙝𝙚𝙣 𝙩𝙝𝙚 𝙣𝙞-𝙜𝙝𝙩 𝙩𝙪𝙧𝙣𝙨 𝙗𝙡𝙪𝙚
𝘼𝙨 𝙄 𝙧𝙚𝙢𝙚𝙢𝙗𝙚𝙧 𝙮𝙤𝙪?”



𝙿𝚑𝚘𝚝𝚘𝚜𝚑𝚘𝚙 𝙱𝚕𝚎𝚗𝚍 𝙼𝚘𝚍𝚎𝚜
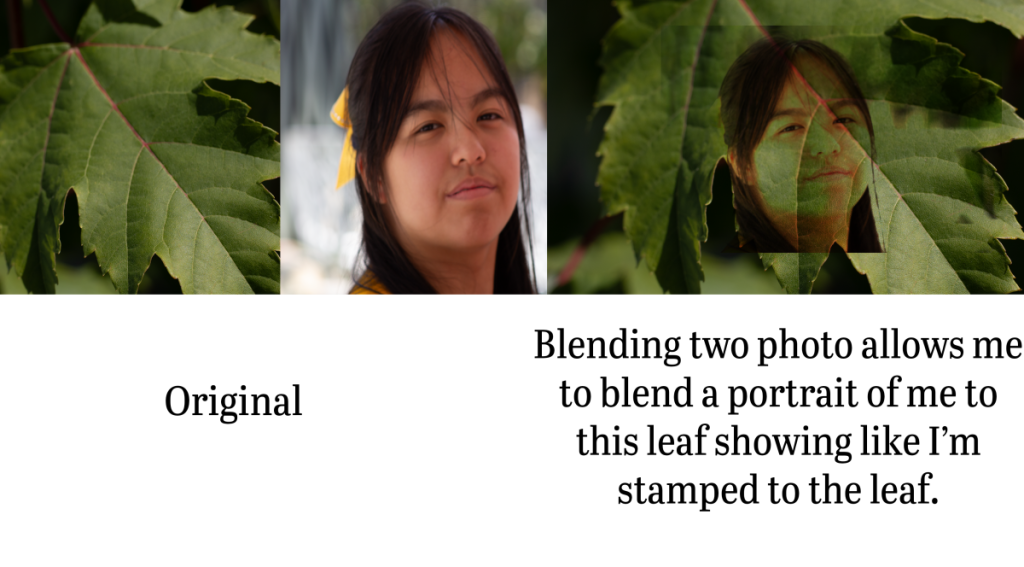
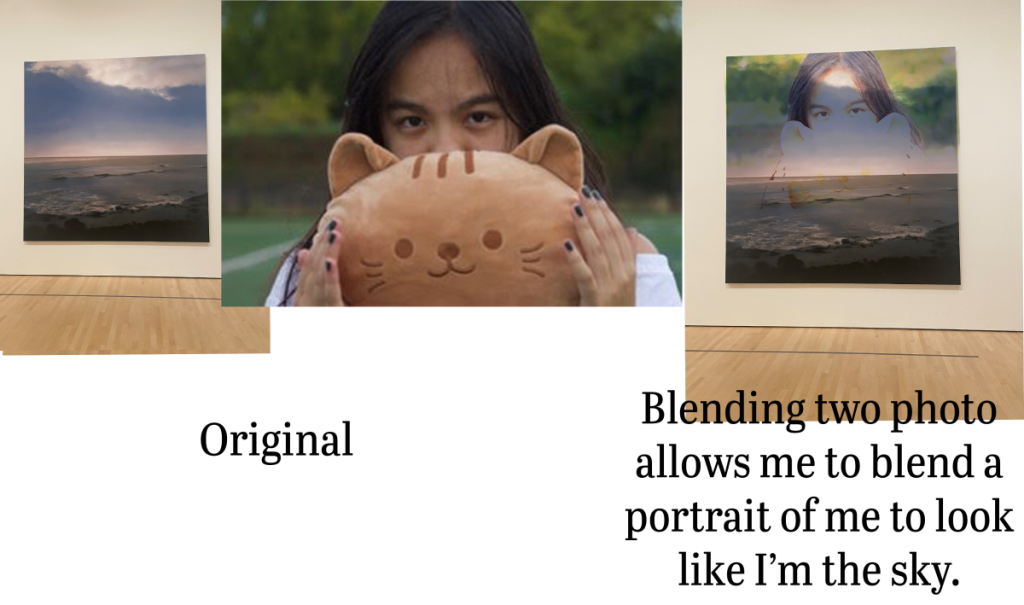
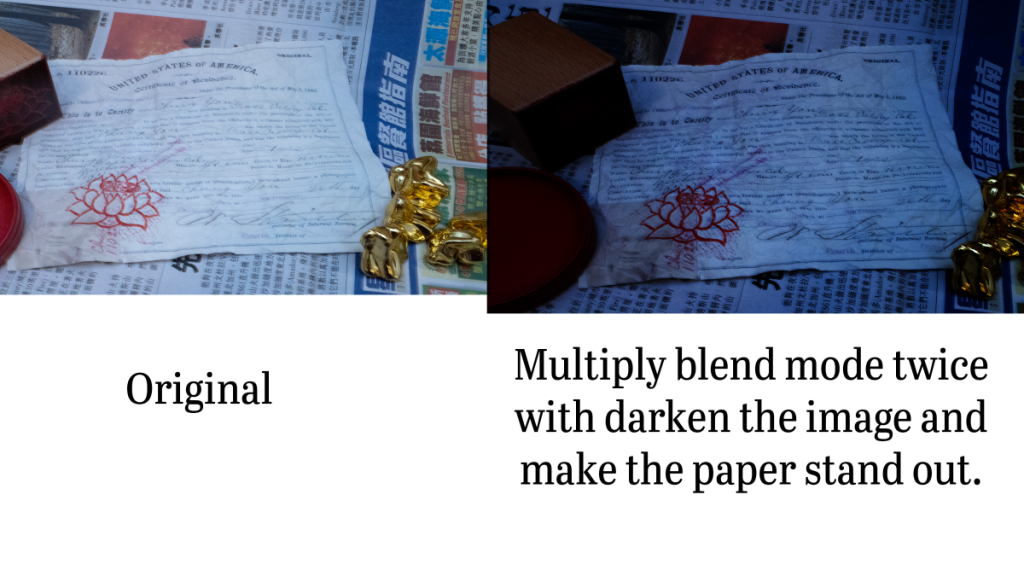
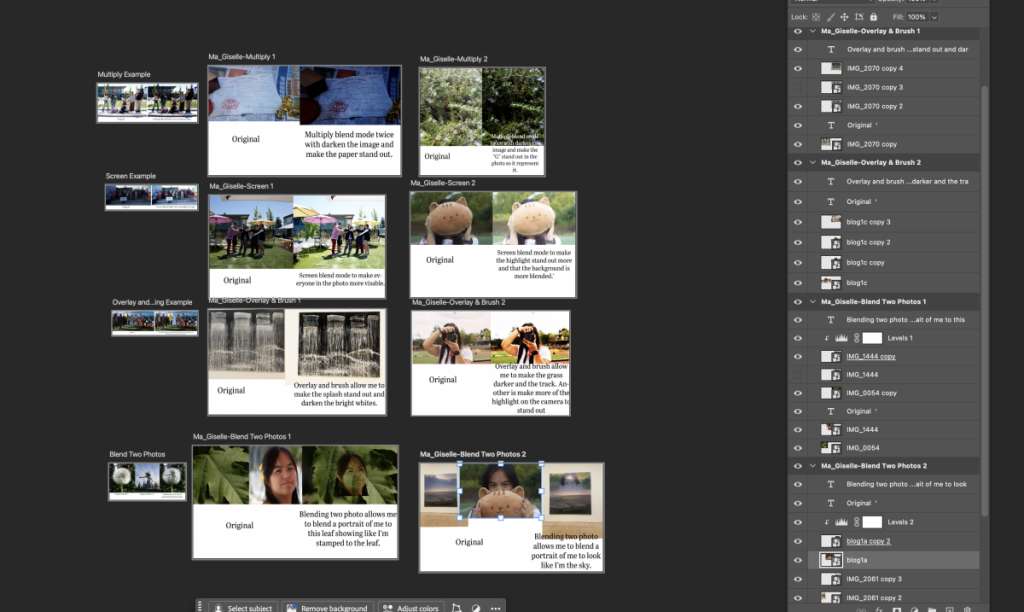
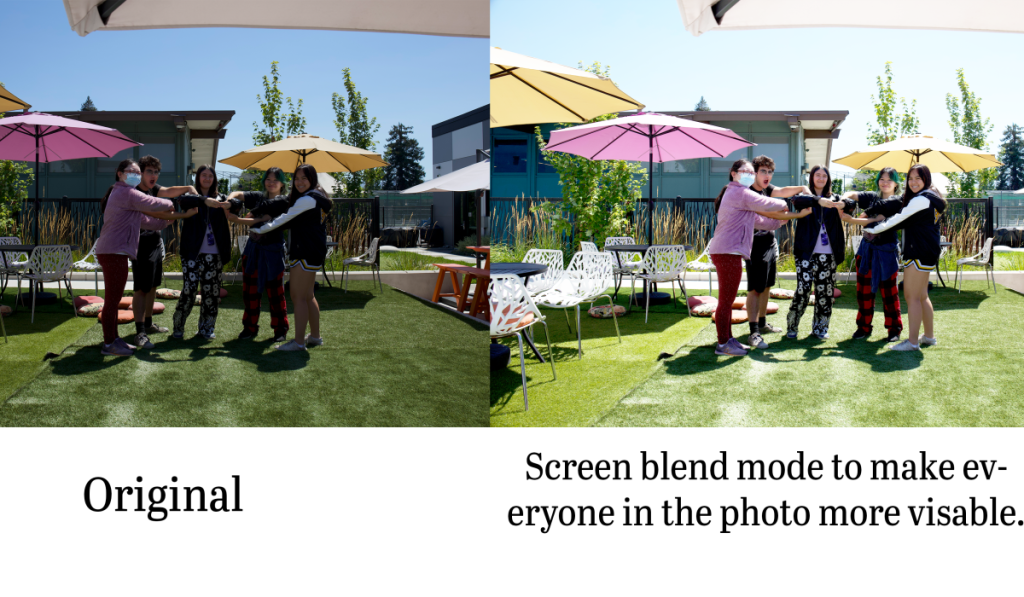
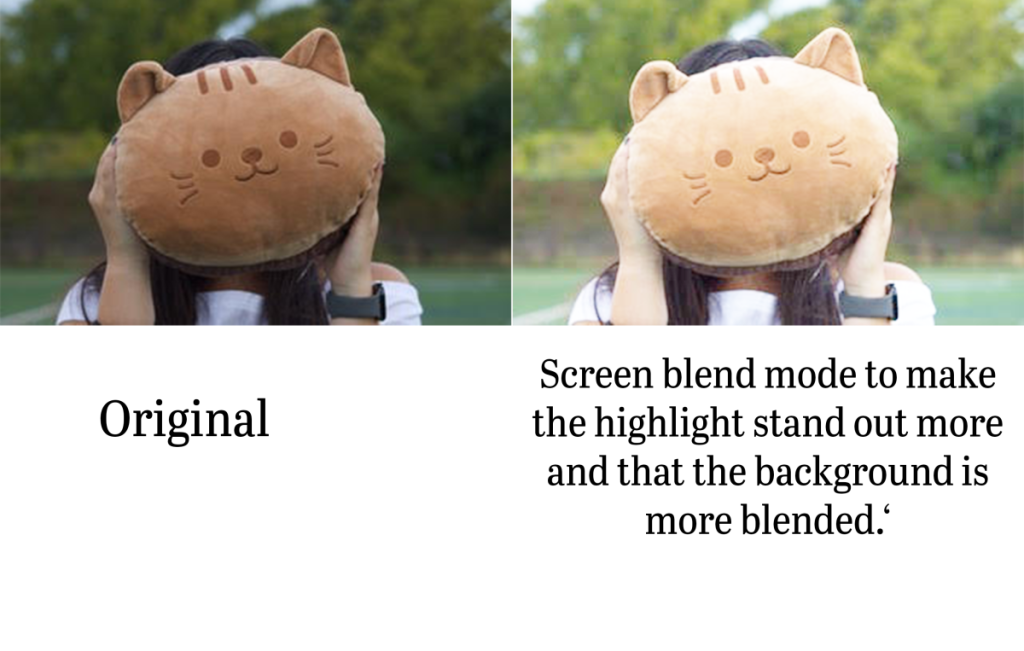
In Digital Media, we would go to Photoshop and use the Blend Modes tools. This feature allows you to be able to change the color or the tone of the photo, which allows it to blend with other pictures. You can also use the Blend Modes tools to darken or brighten up photos. Some of the effects that we use are the Multiply effect and Overlay, which allow us to blend two photos or darken them.
Something that I value learning about and creatively using Photoshop Blend Modes is that I now know how to lighten and darken a photo when I need to. Another thing is that I am able to show more highlights or darken something without darkening or lightening the whole image. I can also now blend two images and can now combine any of my images that I want to be combined. I will be using these new Photoshop skills in my creative projects because, when editing photos, I can use them to edit the photo and know what to do to fix it. I am also able to use these skills to help me with future projects, and I am able to take a picture without fearing that I can’t brighten the image or darken the image later, or add anything to it.


𝙳𝚂𝙻𝚁 𝙿𝚑𝚘𝚝𝚘𝚜
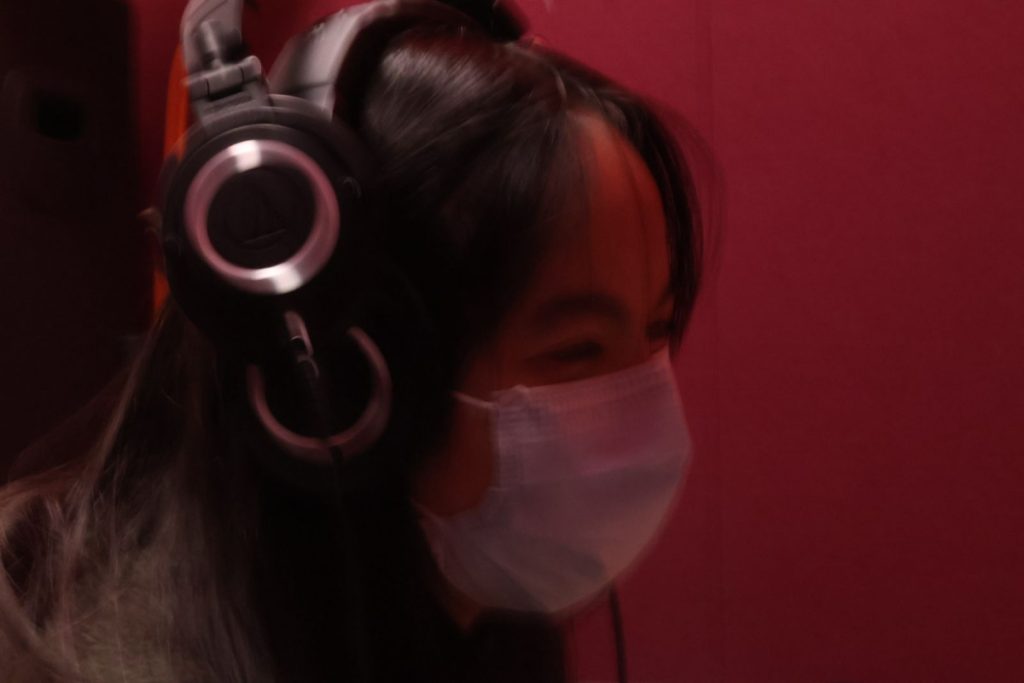
The DSLR Practice session we learn different type of mode like the Av, Tv , and others. These different modes allow us to have different types of photo they can be dark, blue, bright or there is a blur. We would use different types of lights like speed light and color lights. During class we would go outside and take photo because the lighting in the room and the outside are different. Another thing was that we have to change how dark we want the photo and how long until the camera takes the photo. We will also use a stand to take photos and use the count down.


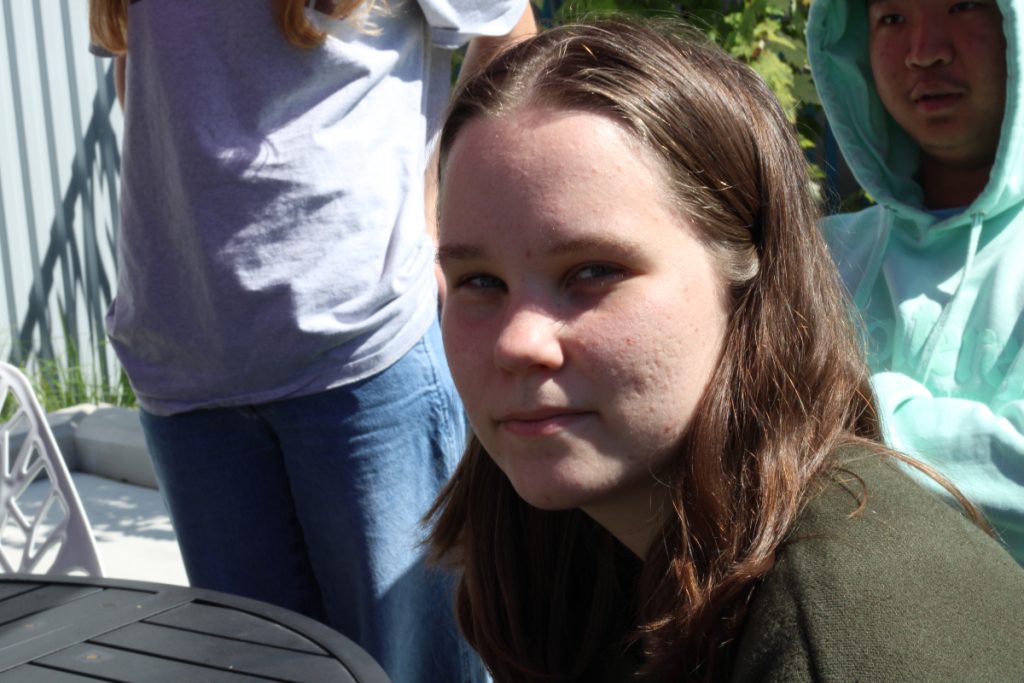


My honest reflection on my experience learning the DSLR was that it was really cool because we can use different mode that allows us to had different type of photos. It allows us to take the same pose but different vibe. In the future I will use this experience to take my photo so that when looking at these photo I can choose which one I like. When taking the white balance photo it was the coolest because you can see the different really well when you use it because the tone of the color change a lot. When I use the ISO it was also a big change because if the ISO doesn’t match then your photo can be really dark or bright. When using the Tv mode you can see it can make your photo really blur but you can capture a photo when you move a light in the dark. Using the Av mode you can see how can focus the person or object you take and that you can really tell what is the center of attention. Lastly when using the flash it can really change the lighting and can make something really bright when there is a every big shade.
𝙳𝚎𝚜𝚒𝚐𝚗
In Design we learn how to use different object that allows us to tell a story or anything that we want to so. We would use photography and different objects. We would use Photoshop and our cameras to take photos and edit. We would also have group work to take to other about our idea and what we need to add. Another thing that we did was learning about what background should match with what. In Design we would have these project “Alpha Name Photography” and “Conceptual Photo”.
𝙰𝚕𝚙𝚑𝚊 𝙽𝚊𝚖𝚎 𝙿𝚑𝚘𝚝𝚘𝚐𝚛𝚊𝚙𝚑𝚢
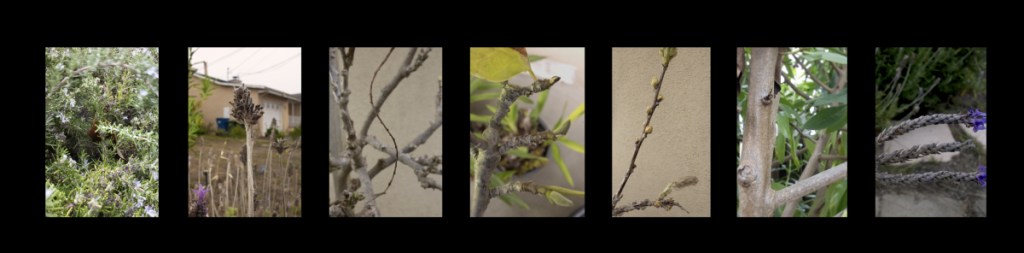
The Alpha Name project was a project that we had to take pictures of plants that looked like a letter. Then at the end we have to spell our names. We can use different types of plants, like flowers and leaves. We can’t adjust the plant, and there should be only focus on the plant and not on the background.

𝙲𝚘𝚗𝚌𝚎𝚙𝚝𝚞𝚊𝚕 𝙿𝚑𝚘𝚝𝚘
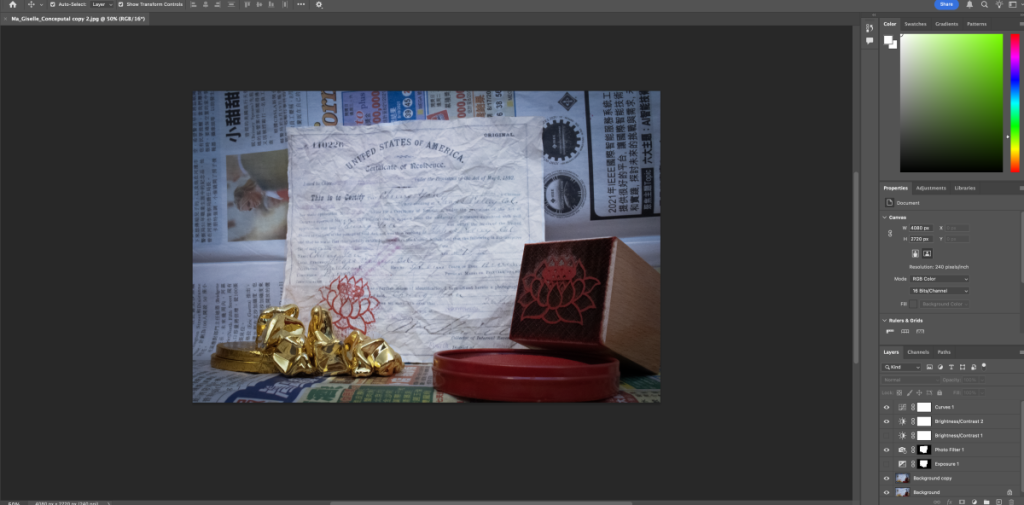
The conceptual photo project was a project where we had to take a photo of a topic that we had chosen randomly. We have to choose two different objects and a background so we can show a story. We had to relate the two objects to the theme so that it could show a full meaning. After taking that photo, we have to write a statement and tell everyone why we have to use those objects, and the background is related to the topic.

My background is a Chinese newspaper, and it represents the Chinese people who went to the United States during the gold rush. The gold nuggets and the gold coin portray a sense of history because they represent the time during the Gold Rush and how the Chinese went to the United States to find gold to make money. At the same time, the stamp and the immigration document portray a sense of loneliness and how, when people immigrate, they feel lonely due to leaving their home and going to a different place, far away from where they were. I made the document by printing it out and putting in water and dirt to make it look like it was an old document from the 1800s. In my photo, I included the ink because I wanted to show the pad that they used to stamp on the letter, and how they always stamp on the corner of their photo, so it won’t block their information that is on the document. I also wanted to use landscape when taking my photo, so that the angle I used would be able to show all the items and the background in the photo that I took.
When taking my photography, something that I learned was that there can be many different angles to use, and I don’t need to be afraid to take a lot of different photos. Another thing that I learned about while taking my photography was to sometimes take a break from using the flash because when using it too much, it will get hot, and it has a higher chance of catching something on fire. After taking my photography, while editing the photos on Photoshop, something that I learned was using different section tools, like the Magnetic Lasso Tool, and how I didn’t use it because it was hard to control, and it’s hard to get out of that section tool to change it to another tool. I also learned to use different tones to create a different vibe. I changed the photo to look older by adding a bit more yellow and orange tone. One specific thing that I did on Photoshop to enhance my image was adding a vignette and changing it to -30 to show more focus on the items that I used.