In our Animation class, we worked a lot more with the main programs we used for our animating: Maya, ZBrush, and Substance Painter. Previously, we worked on understanding the different polygons in Maya, and how you would work with smoothing them out and changing the poly counts in ZBrush, then texturing in Substance. We demonstrated our understanding of these by making a model of a weapon using all 3 programs:
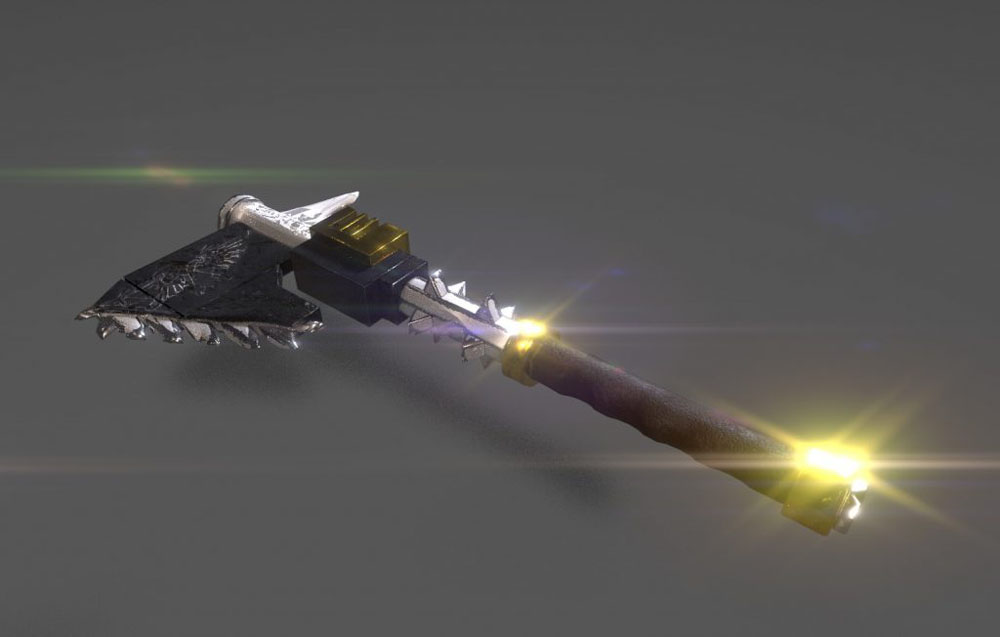
You can go back to the Reflections page if you want more information on this weapon.
Environment Map
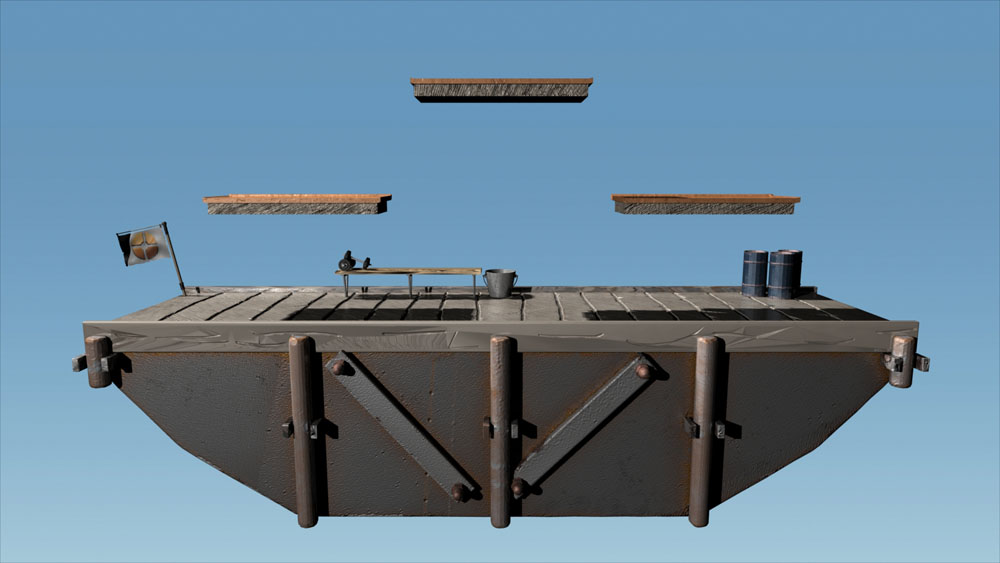
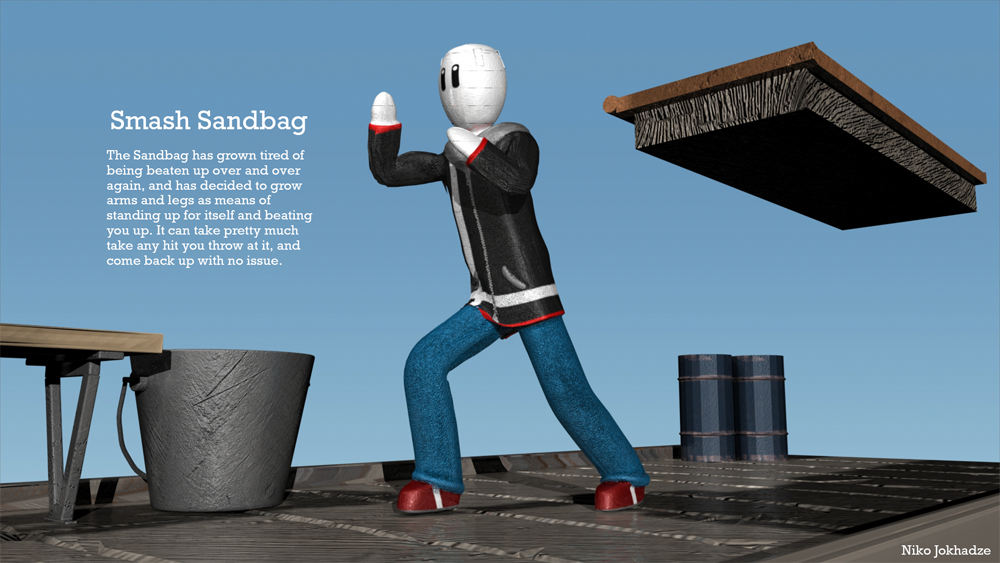
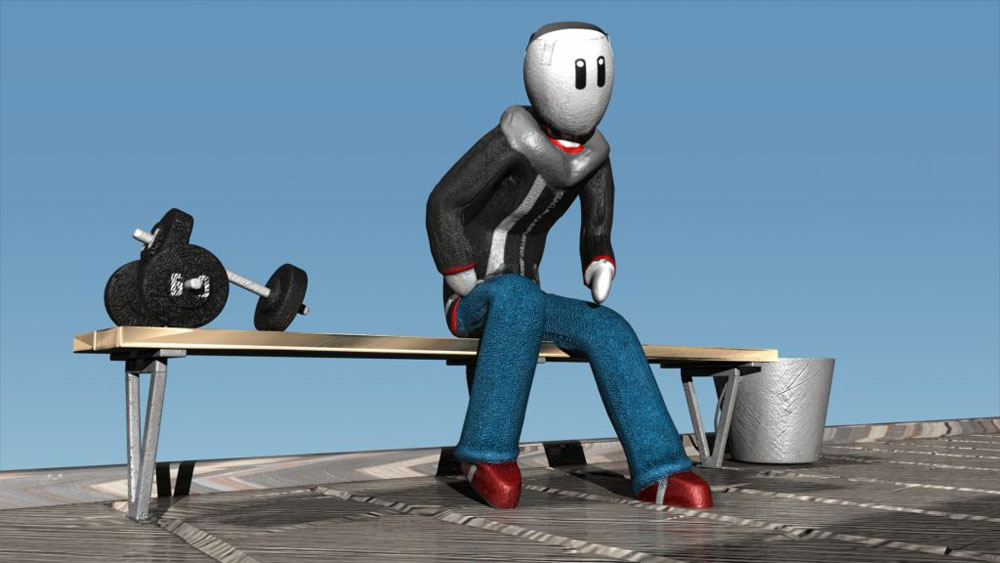
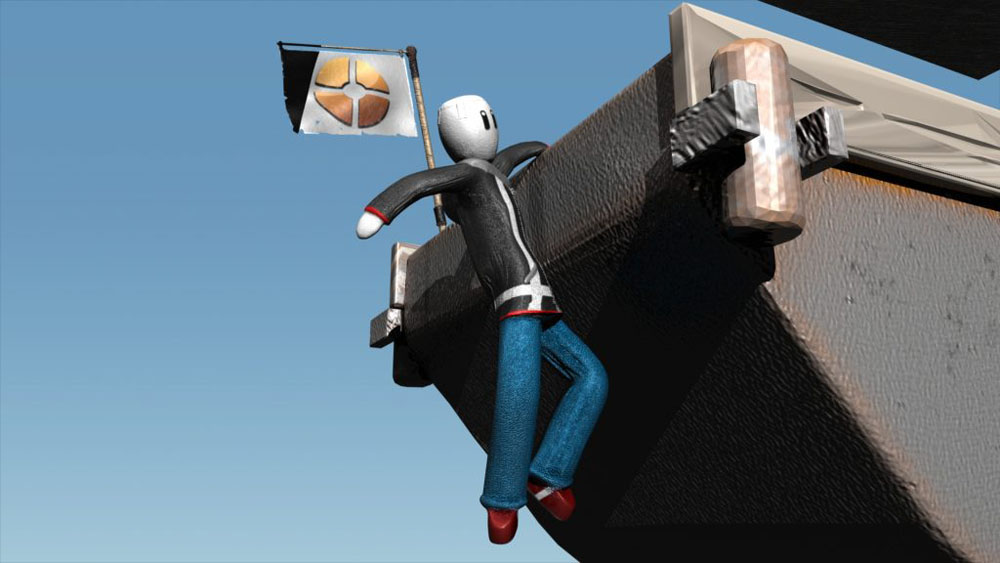
Once we finished with our weapon, it was time for us to start thinking about making multiple models that would come to tell some kind of narrative. It could really be anything, and we were encouraged to make something that we might use for our Zenith project, and since I already had a good idea of what I wanted to do for my Zenith, I got to work. First, we modeled an environment. This was done by making at least 5 different parts of an environment, each done with individual smoothing and texturing, so you wouldn’t have a cluttered mess of a file in one go. My environment is basically the Battlefield stage from Super Smash Bros, with the theme being 2Fort from TF2. I started with the entire base of the stage as one piece and had the floating platforms be their own separate file, so if I wanted to just use the stage and not the platforms, I could have a Final Destination version of the map. On the map, you see a flag with the TF2 logo, a trio of oil barrels, and a bench with a bucket and a pair of dumbells. These 3 pieces were all their own files with their own texturing. Once we had all 5 pieces with all of our textures, we put the pieces together in Maya, along with their textures and lighting files to make an environment:
For each object we made, they came with a multitude of files for use in Maya. For example:
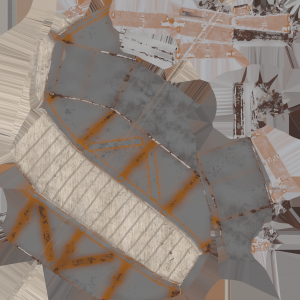
This is the image of the texture file for the base of the map, so the texture could show up in Maya.
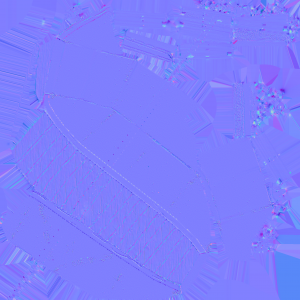
And this is the Normal OpenGL file for the base of the map, allowing the lighting we used in Maya to properly show up.
Character Model
Once we finished the map, we started doing character modeling. Keeping with the theme of a narrative, I wanted my character to have a Smash theme to it, so I decided to take an existing entity in Smash, the Sandbag, and personify it by giving it a normal body, limbs and all. I themed it’s clothing off one of the Mii’s base clothing options, with a Smash logo doing down the hoodie and relatively basic clothing throughout. The head of the model is basically just the Sandbag. Here’s what it looks like:
When building the character, it started out with the exact same process as all of the other models we made: build a base character up in Maya, work on smoothing out parts and having a low poly count in ZBrush, and texturing in Substance. Just like with the environment, we put the model into Maya and applied the texture and lighting files to have it fit into our environment. From this point, we got into something new, which was rigging and animating. From here on out, the work was done exclusively in Maya. The first step was rigging, which is basically setting up a skeleton for your character. You have these bones and joints for your character, so you can move them around however you want. There were 2 options when making the rig: build it up yourself, or use the auto-rig feature. Compared to my classmates, the build of my model was rather basic, and more closely resembled an actual human, as opposed to some of the other models they had. The auto-rig feature worked very well with this character, and at this point, we started animating. The process for animating was a bit familiar to some animations we did back when we worked with 2D animating. We mainly worked using pose-to-pose animation at 24 frames per second. With the rig, we did a couple of poses on our environment:
Also, we made 3 different animations that were all in a loop: a normal walk, a run, and a jump:
We also took the time to work with a motion capture suit. Natalie Hu and I wore the mocap suit and did several takes of some different actions. My video has my character preforming a bunch of kicks and some punches, which I recorded.